Strobe, this is Easy. Hussar unit spotted moving north, break. Two lances, mixed vehicles and 'Mechs, break, approximately 40 kilometers south of objective alpha. Vehicles slowed by temperature, break, 'Mechs unaffected. Time is now 1641 lima. We are moving to engage, over.
Easy, Strobe. Roger that. Cleared to engage. Good hunting.
Strobe, Easy. Prep sunglare. There should be plenty for them to do by the time we're done. Out.
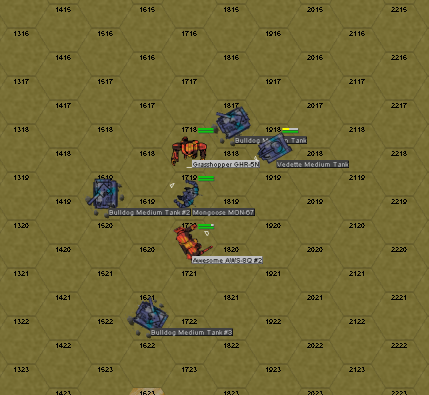
Contact. Hussar units have fled their defensive positions to avoid getting outflanked, and run straight into the 11th Daybreakers. The temperature has slowed the Hussar heavy vehicles considerably, which means that this contingent is unable to evade the heavier, nominally slower 'Mechs and the Daybreakers force an engagement. Daybreakers attack from the west, targeting the quicker and unaffected by temperature light 'Mechs, and waiting to pick off the vehicles at their leisure.
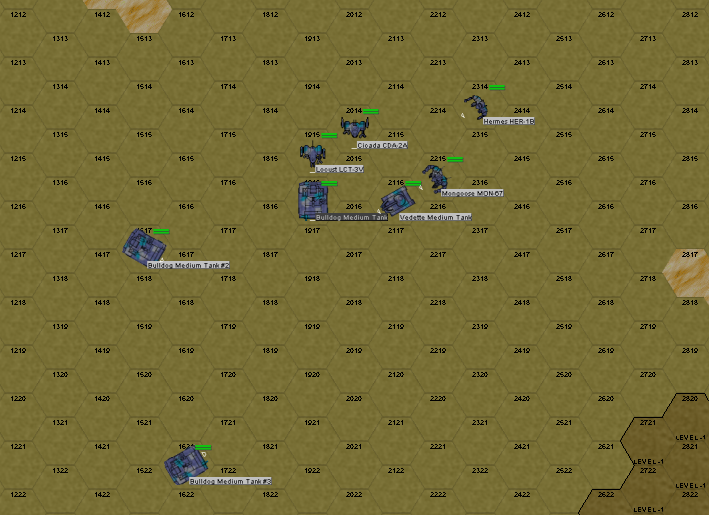
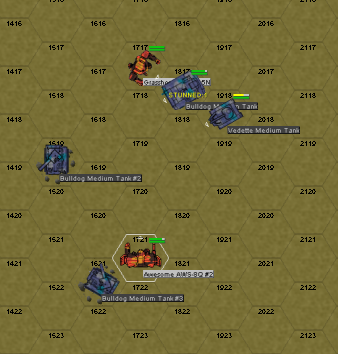
The Hussars realize their predicament almost immediately. The moment they realize they can't escape without being picked apart from the rear, they turn to engage. The Bulldog in the back is either suffering from a minor breakdown or didn't get the message over the company net, it still has its soft rear armor to the advancing assault 'Mechs.
That's a fairly impressive oversight, considering that the Hard Light 'Mechs are already in range of the tank. Technically, Easy and Rapier could both have opened up with full fusillades by now, and I can only assume they haven't in order to hold fire for a more devastating opening barrage. Whatever the reason, that Bulldog is in for a world of hurt the moment they line up a better solution.
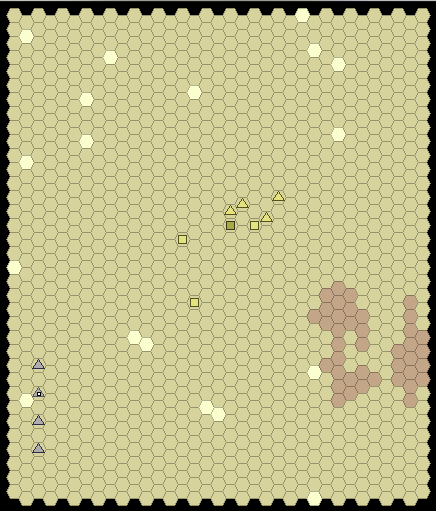
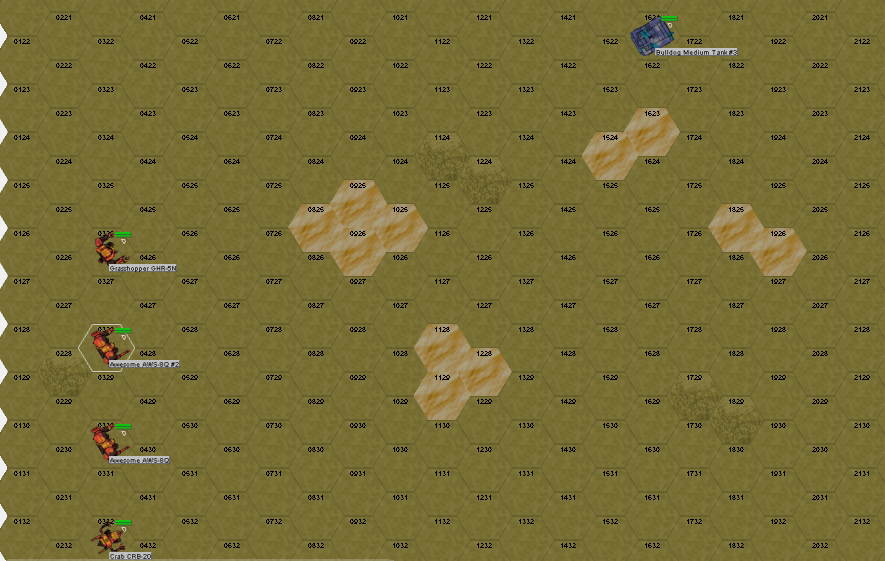
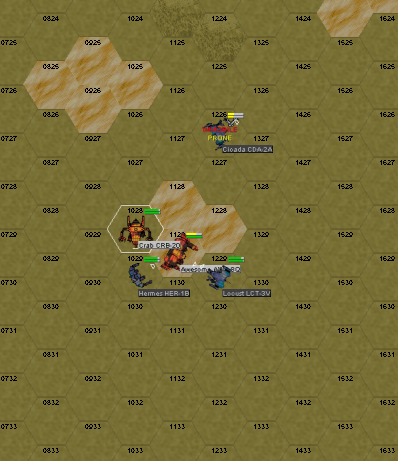
Here's the whole picture on a handily enlarged minimap to get a look at where the forces started relative to each other. Range is already at 390 meters and closing for the lead Awesome, piloted by Master Sergeant Bullman.
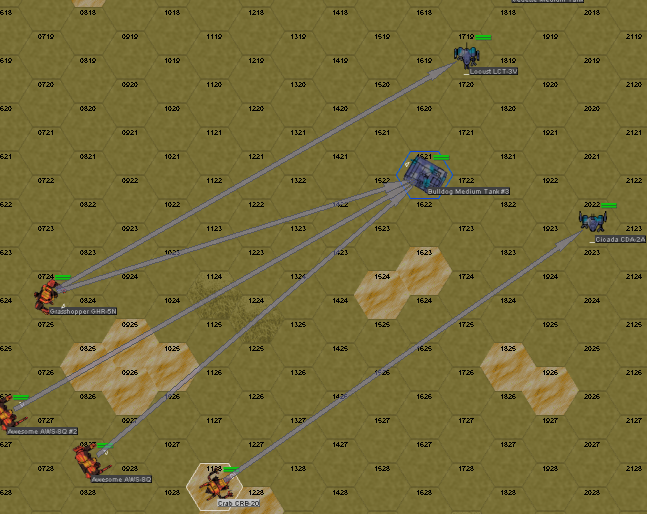
Lieutenant Gibbs and Corporal Vidal advance along the flanks and begin sparring with the two fast-movers that have started for the lance. Easy and Rapier both target the Bulldog and unleash a full six-gun salute in his direction (at 8s). Duck adds a few medium lasers to the barrage to not waste any heatsinks and a PPC at the Locust. Werewolf opens up with his main guns on the Cicada. He's not likely to hit, but he wants to make sure that the Cicada knows it's not getting a free shot at the vulnerable rear of the formation.
The Bulldog, incredibly, weathers the entire hail of beams and particle projectiles. There's nothing to speak of left of the armor on the left side, but the new inclusion of the Glancing Blow rule means it's not a kill. One PPC hit and a medium laser from Duck both glance, dealing a total of 7 damage between them. Good, in a way, and in a spring of good news, Rapier's pair of connecting shots stun the crew and disable the engine, so he's going to be a sitting duck for next turn.. I want to try and disable the turrets on these guys to see if that's what it takes to salvage vehicles. All enemy return fire also misses.
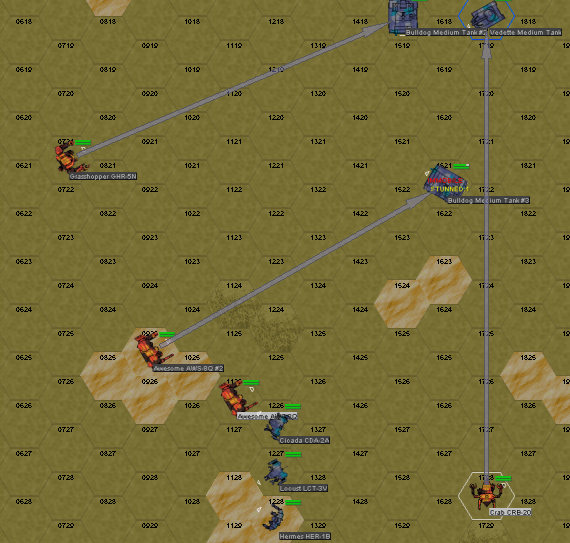
The enemy 'Mechs turn out to be significantly more bold than I expected. Fanatical is damn right when it applies to the 1st Hussar pilots. Werewolf and Duck find themselves out of effective response range, either out of medium laser range or out of a good firing arc. In retaliation, both of them take aim at relatively easier shots on vehicles. Duck decides the next Bulldog is ready for harvest, and Werewolf spars with the Vedette at range. Rapier goes for the turret on the first Bulldog, while Easy shows the Hussar 'Mechs the error of their ways. Double PPC barrage goes out toward the Hermes, as the least affected by minimum range, and the Cicada is about to get a pair of punches and a Small Laser.
Once again, Rapier absolutely savages the Bulldog, a direct hit from a PPC gouging into the left side and leaving it a smoking pile of wreckage, right before the other two shots pop the turret off like a cork. That thing's hardly going to be worth salvaging after this is all over. Duck damages the other Bulldog, but only slows it down instead of crippling it. A few random lasers from the Hussar 'mechs skip and glance from the Awesomes' heavy armor. They'll have to be dealt with immediately.
Rapier, splash one Bulldog.
Speaking of which, Easy's kick the same turn takes the Cicada's leg off at the hip in one stomp, and it falls to the ground in a heap while Easy stays standing. Scratch one 'Mech; it'll be down and out by next turn, at the latest.
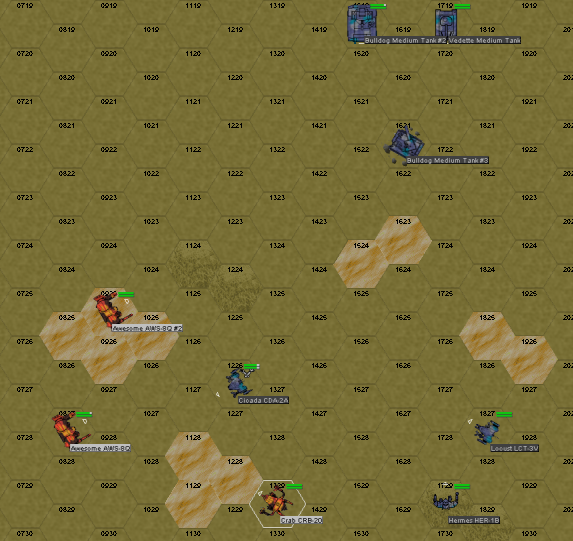
The Cicada, impossibly, manages to stand up. No matter, it's functionally immobile. Werewolf closes back in to corral the 'Mechs, and succeeds in driving them out of close range. Close enough. Not pictured in that shot is Duck further north, taking the fight to the vehicles that haven't been engaged by the main lance.
The next round of fire sees the Awesomes take some non-trivial armor damage. I'm going to have to start actually moving with them to keep the numbers up or these 'Mechs might actually inflict some meaningful damage. On a contract like this, meaningful damage is a victory for the Hussars. Duck and Rapier concentrate on the second Bulldog, and a shot from Rapier caves in the right side this time, and the tank is knocked out. Easy takes the beatstick to the Cicada, which falls down again (this time missing both arms, too).
Rapier, splash two. Bulldog two is down.
Easy, Cicada neutralized.

The Cicada knocks itself out trying to stand up (no surprise). Werewolf gets the drop on the Hermes, but opens himself up for the Locust. Good enough tradeoff. This turn is going to be painful for the Hussars.
As it turns out, that tradeoff was not very good. Werewolf takes a damaged heatsink thanks to a direct blow, but the Vedette loses most of its armor to a barrage from Rapier (seriously, he's getting a distinguished marksmanship award for this, or something) and the other Bulldog is stunned by Duck. Easy's kick should put the poor Cicada out of its misery momentarily. Or leave it with one point in the center torso and no more gyro. At this point, I'm just going to leave it there and focus on things that can actually shoot at me. Maybe I'll get the unconscious, immobile 'Mech as salvage? We'll find out.
Duck and Rapier are about to utterly demolish the rest of the vehicles. By the letter of the rules, once they're destroyed, the mission ends in victory as the enemy withdraws. If I happen to kill more of them on the last turn, though...
The Bulldog takes a mauling enough from Duck to put it out of its misery, and the Vedette is on its last legs. The Hussar 'Mechs are luckier even than they are skilled, landing enough damage on Easy's Awesome to drop it to the ground. He avoids damage this time, so no Combat Wounds Ribbon for this engagement yet.
Duck, Bulldog down.
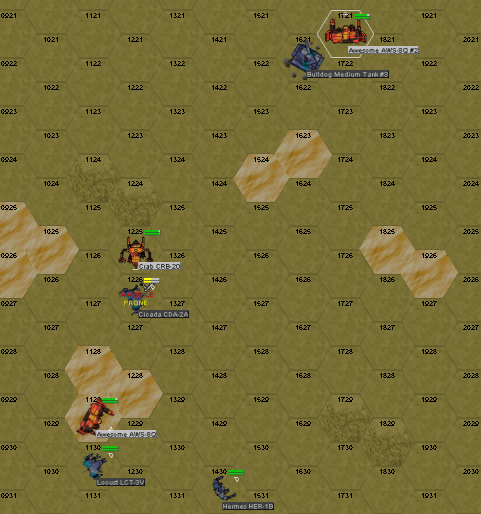
Here you see the 'Mechs make their first really fatal mistake. Every single one of them is in melee range of one or more much larger 'Mechs. If the Vedette doesn't buy it this turn, I will be very surprised, and one or more 'Mechs immobilized is more likely than not. The Locust took a head hit last turn, so there's a chance that'll contribute to some decent salvage, too.
This turn, Easy takes a 2 point head hit, so enjoy that shiny new Combat Wounds Medal. Again. He stays standing despite weathering a painful array of fire, and Rapier rips up the Vedette. The Locust, Hermes, and Mongoose are all in various states of pain at this point, but none of them are combat ineffective yet. Time to fix that.
Rapier, splash three. Vedette down for the hat trick.
Physical phase happens, and everybody kicks Easy's 'Mech, all of them hitting the same spot and breaching the armor enough to take out a heat sink. Damn, looks like the techs are going to have some stuff to actually do after this battle, unfortunately. Then, he falls over and knocks himself out again. This is becoming a disturbing habit, Easy.
In better news, the Locust and Mongoose both lose their legs in the return kicks, and the Hermes avoids the same fate by two points. Regrettably, it looks like he'll get away, because all enemies begin withdrawing after the complete and total destruction of their armored column. In this case, “all enemies” means something like the Hermes and nobody else, because every other Hussar unit on the field is missing legs or unconscious or both.
Easy, Locust down.
Duck, Mongoose is down.
I claim victory, and the Hermes limps away with a damaged foot actuator. I'll see if the game is willing to award me those 'Mechs as kills or if they somehow manage to 'escape'. Interestingly, the Cicada pilot managed to wake up on the last phase, so he could conceivably escape? I highly doubt it, but I don't know how MekHQ calculates these things.
Strobe, this is Easy. Sunglare. I say again, Sunglare. Get those salvage teams out there. We'll remain on station for one-five mikes before withdrawing to the rear for repairs.
Final count (according to end game screen):
Rapier – 3
Duck – 1
If I captured all of the legless 'Mechs, Easy will be credited with two, and Duck with another.
Awards to distribute for this sub-op:
Distinguished Marksmanship BadgeMaster Sergeant Anders “Rapier” Bullman (he hit with at least one shot every barrage, every turn, and took down three of the vehicles with impressive shot grouping. It's either this or a Red Light Award for Valor.)
Combat Wounds RibbonMajor Caden “Easy” Webb (second award)
Thule Campaign RibbonMajor Caden “Easy” Webb
Lieutenant Andrew “Duck” Gibbs
Master Sergeant Anders “Rapier” Bullman
Corporal Jean “Werewolf” Vidal
This time I'll go into a bit of the immediate post-battle stuff.
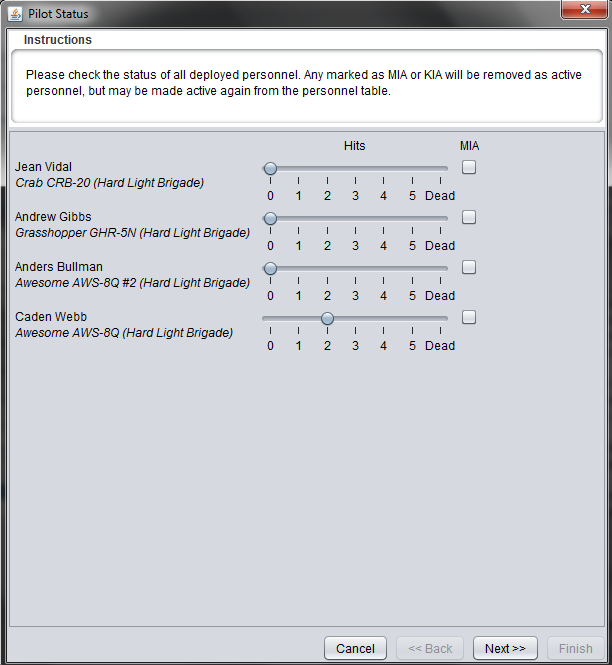
Here, I can look at who sustained injuries during the battle, and can manually readjust them if there's extenuating circumstances (like the 3rd Jump on rescue status). As you can see, Easy is the only one to take a hit this time.
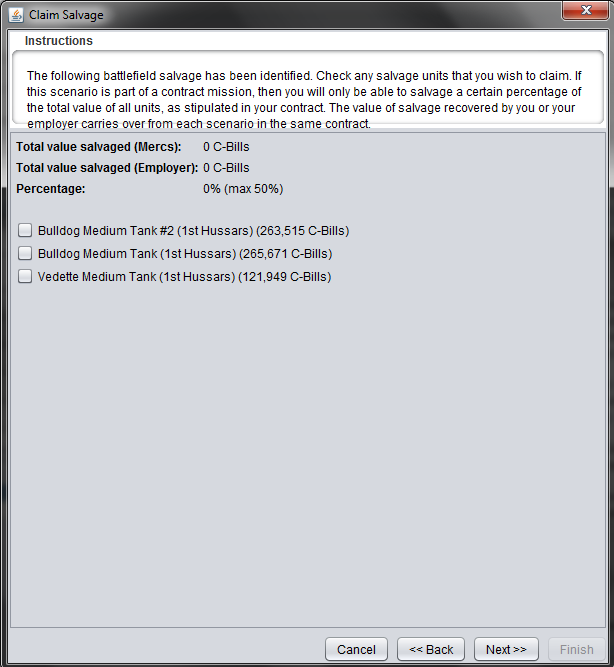
Here's what I can salvage off the field, none of it functional. Turns out, none of those legless 'Mechs were captured, despite my units controlling the field after the fight. Even the Cicada with one leg and no arms managed to get away, inexplicably. The next time I get into a situation like that, I'm going to manually eject the pilots who are in otherwise hopeless situations. This is one of those places that the bot is really limited, and I'm paying for it. I decline all of the vehicles, because all I'd be doing is stripping engines, armor and weapons, and I can build up a little salvage credit with my employer. That 50% limit is for the
whole contract, so anything I pass here goes toward the contract salvage total, and lets me grab a functional unit further down the road without getting a minor contract breach.
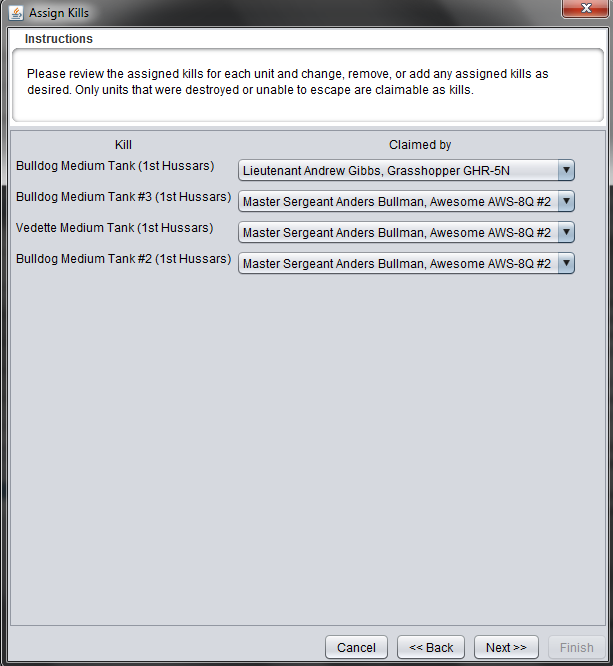
Here I can review and assign kills. If I disagree with one of the kills here, I can change it, and sometimes there will be unassigned kills (either units I don't normally control, like allies, or pilot error) that I can give credit to my pilots for. This looks good for that mission, however, and will stay how it is.
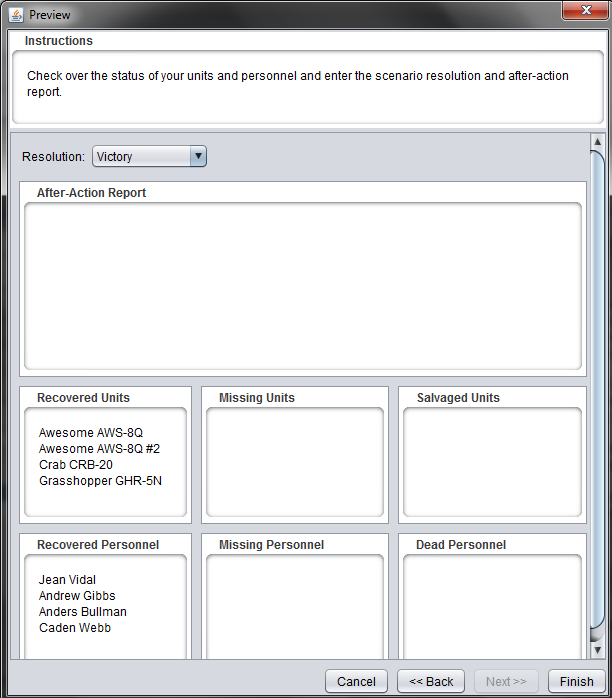
Here, I write the After Action Report and go over everything that I just clicked through to make sure it's all accurate.

And here it is all written up and ready to be submitted. If I want to go read it again, I can click on the completed scenario and check both the briefing, committed forces, and after action report as many times as I want. If anybody uses the saves I attach to these posts, you'll be able to see everything I've typed for everyone.
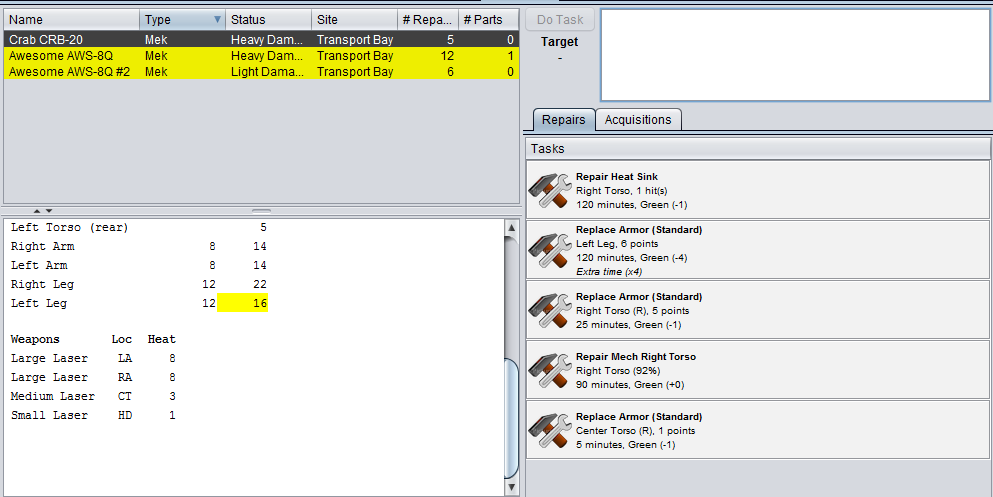
I put Easy in the tender care of Dr. Bones, and head to the repair bay to take care of what I can before the next sortie tomorrow. I want all of my techs to do as much as they can today before there are more repairs to do tomorrow. I've already completed the Grasshopper's repairs in this picture, because it was missing a grand total of six points of armor. Easy's Awesome has taken the most damage, though both he and Werewolf took some internal damage that needs to be repaired. I set the techs on the 'Mechs, and get ready for sub-op BRAWL tomorrow.
It took less than a minute for the 11th Daybreakers to completely demolish this armored column, compared to the nearly 15 minutes they spent brawling in Milos Spaceport last time. This is a lot closer to how games normally go, but this was pretty fast even against the bot. Expect something like a happy medium for the majority of games.
The repairs end up taking a
little bit more time than I have with my techs to finish. I run out of armor in the company stores, too, and will have to get some more before the battle heats up tomorrow. At this point, both the Grasshopper and Crab are fully repaired and the Awesomes are missing 74 points of armor between them; less than five tons. I'm not going to have another battle until Monday, at the very earliest after these two, so I've got plenty of time to fix these up before then.
