Heres a quick and dirty was of merging textures into one object. There are better ways, but they all use the same basic techniques (or at least the ones i know of). This turned out to be a lot harder writing a tutorial on than i first though..
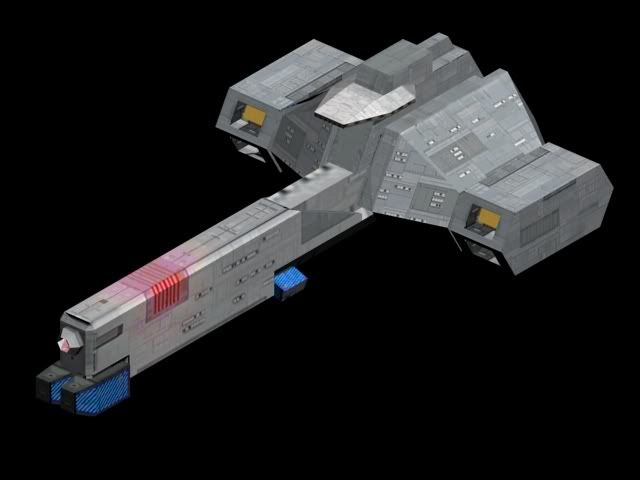
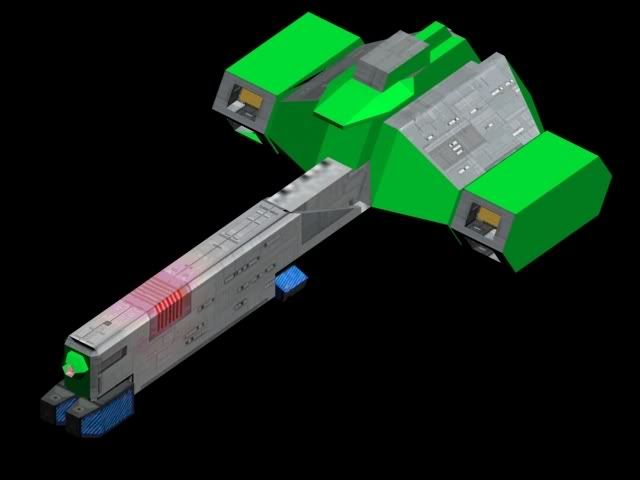
In this example I'm going to be converting a Murphy class destroyer.
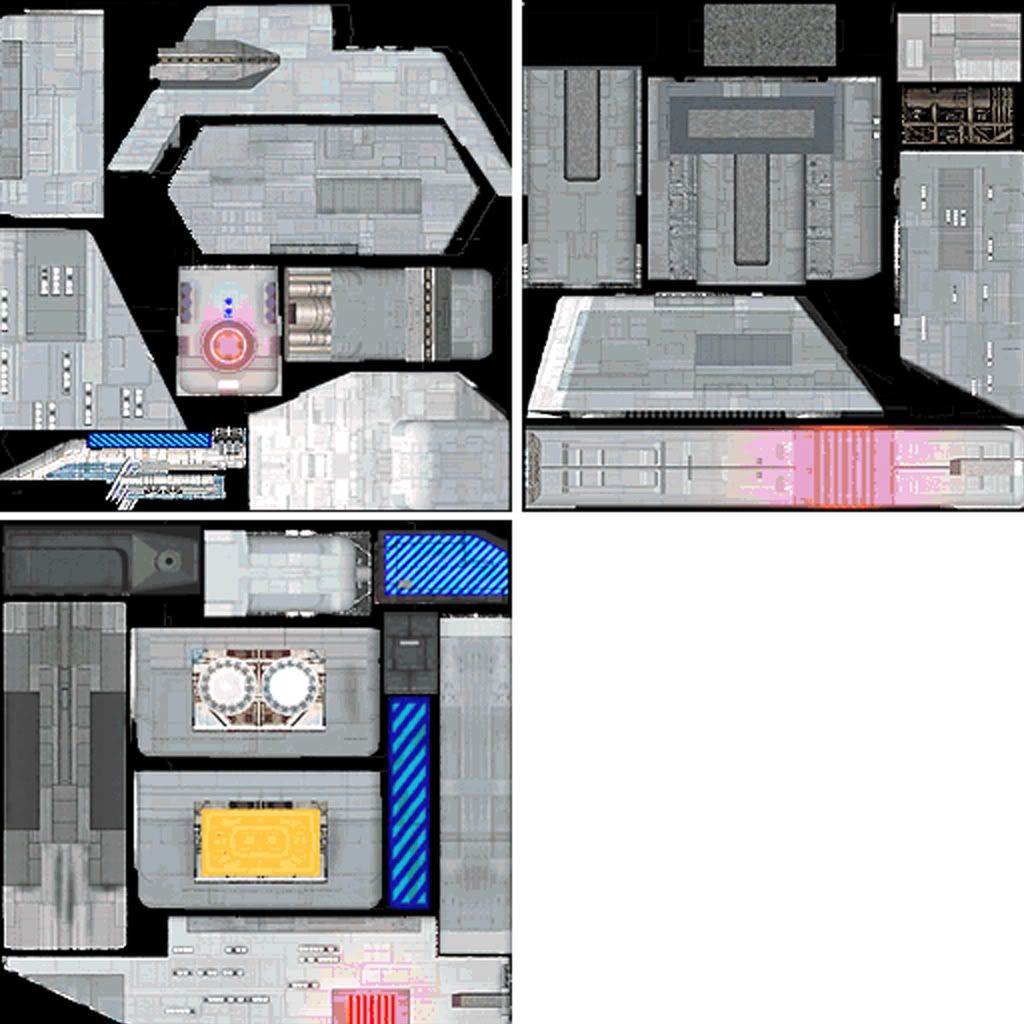
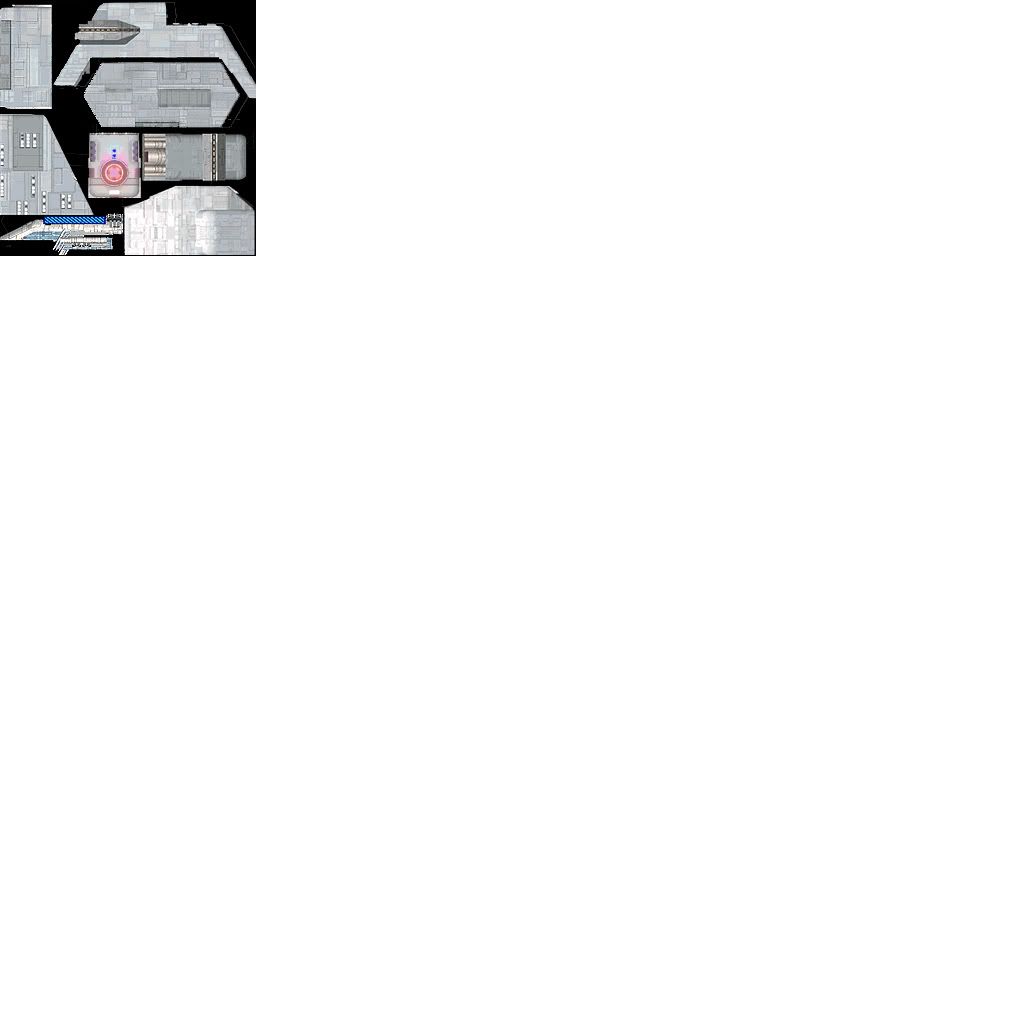
These are the three textures that come included:

The model consist of 4 separate subobjects (the main hull, the bridge and each of the engines)
I'm going to first create a blank image in photoshop (I'll use 1024 * 1024). Also load up all your textures needed (in this case the 3 above)
Prep the model: All Max works
step 1.
If your model has more than one subobject, attach them together into one mesh. If not skip down to Prepping textures.
step 2.
Open the material editor, click on the eyedropper "Pick Material From Object", select the model. Max will fill in the material slot with multi/sub-object that contains all the textures used on that mesh. Look through the subtextures. If there are no texture duplicates skip down to Prepping textures.
step 3.
Starting with your first duplicated texture (let's call it Texture A for now) remember which ID numbers it contains (in my case it's 2,5,7,8). The first number (2) [let's call it the original ID] will be the only one remaining for Texture A when we're done.
step 4.
Activate poly editing mode on the object. We want to collapse all the duplicate id's down to the original ID. I.e. for texture A - 5,7,8 will become a 2.
step 5.
Way down in edit panel is Surface Properties. In the text box right next the button "Select ID" enter the duplicate material ID (in this case #5). It will select some of the polygons. "Set ID" should show the same number, 5 in this case. Replace that number five with the original ID number and hit enter. [If you now select the original ID you will now see that what was part of the duplcate is now part of id original]. Repeat for any other duplicates on that texture. (in my case 7 & 8).
step 6.
If you have other textures that have duplicates go back to step 5 and repeat.
step 7.
At this point if you do step 2, the other duplicate ids will still appear but if you try to select all the duplicate id's it'll come up empty. You can use the delete button to delete them, do note it'll delete the last id and work it's way up, otherwise simply ignore it if you wish, we'll end up not using that multi-material material anyways. At this point the model should look exactly the same as before (if not, you made a mistake somewheres)
Prepping the Texture: Photoshop and Max
Step 1.
Load all the textures into photoshop and create a new much larger texture (I'll use 1024*1024) If it's too big thats not a problem.
step 2.
Copy and paste the first texture into the blank image (it'll be way smaller hopefully than the blank image)
step 3.
Next find the areas on the original model that correspond to that material id's.
step 4 (optional but very useful at least for the first round)
One helpful hint in doing it that way is to take the original texture rename it, then with the original textures name put in a pure color map (like green) [size and quality doesn't matter at all] You will probably have to tell Max to reload the texture. Heads up! If Max complains it can't find the texture, even though it originally existed. Save a copy of the max file in the directory where the textures are.
step 5.
As you can see in the rendering, it's obvious which polygons refer to that texture.
Prepping the model part 2: All Max
step 1.
Now in an empty material slot in Max load your new texture. You should have two slots filled, one containing a multipart original textures and your new one with just one corner filled.
step 2.
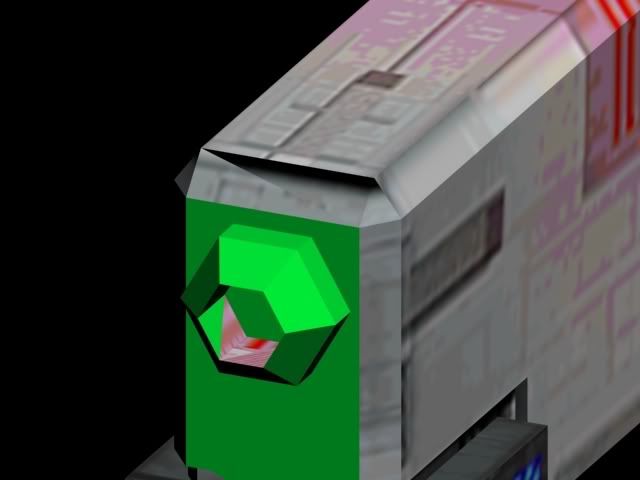
Look in the multi-material slot. See which ID is now all green.
If you look carefully (especially on the starboard engine intake and on the front gun, theres some errors (most likely from the creator or during conversation process somewheres) I'm going to fix those now rather than wait and wonder what those polygons are on the uvmap down the road. Also there are some parts (that don't quite seem right, for example by the bridge theres a polygon thats completely surrounded by green, that probably should be part of that texture too). A lot of it is guesswork and estimating.
step 3.
If you can't see any bugs or problems with mapping skip this next phase.
Fixing the model: All max
step 1.
Go into polygon edit mode. Select the polygons that need to be included (like those on the gun).
step 2.
Go into polygon edit mode (assuming it's a editable mesh). In the Surface Properties, replace the "Set ID" to that equal the green parts (in this case the green is ID #2, replace the numbers with 2). Those parts should now appear green.
step 3. If you see spots that don't look like they belong there (the engine intakes have single green polygons) they need their ID's set to the right texture. How do we do this. Select one (or more) of the misplaced green polys and try one of the other ID's (1 or 3 in this case). If one doesn't seem right try another. Hint: Check the ID's of the polygons next to it, that might give a clue one what it's suppose to be.
Converting to new material: All Max
Step 1.
Go into edit poly mode (either triangle or poly will do) Select the material ID for the greens (by now you should know it's in Surface Properties)
step 2.
Open the material editor and drag and drop the new big texture that you're creating onto the model. It should look weird, with large areas of pure white

Step 3.
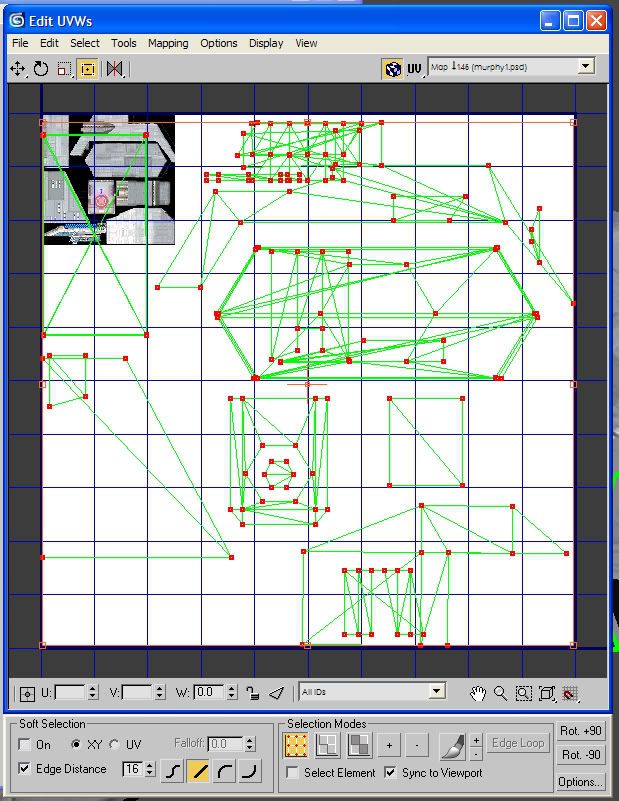
Apply a Unwrap UV modifier to the object and edit
step 4.
As you can see the uv map is way out of wack. If the texture named in the upper right hand drop down box isn't your new texture change it to show the correct name.
step 5. (optional, but helpful)
In the Edit UVWs bottom right click the "Options..." and checkmark "constant update". This will constantly update the model to reflect any movement you make on the UV map without having to let go of the mouse button.
Also you might want to weld vertices together (in the uv edit window) this model they were completely separated and everything had a green unattached lined to it.
step 6.
Make sure everything in the uv edit window is selected and your in freeform mode (forth button on the top row)
step 7.
Move the upper left hand corner of the red outline box to the upper left corner of the area of the texture you've already worked on (in my case it's the top left black corner) and move the lower right hand corner up to match the lower right hand corner of the black area.
step 8.
Try and align the corner reasonably well. Keep looking at the model to verify everythings looking good. If black starts appearing you may need to adjust things slightly. Somethings might require a little fudging with the original uv map to make them look good.
Repeating
Step 1.
Go back to Prepping the texture and in area right next to the where you added the first texture, add the second one, select the material ID's for that texture and adjust their uv maps. Repeat as needed until all the textures are converted over. You probably won't need to use solid colors for the rest of the repeats unless theres quite a few textures used. This one only had 3 so after the first round, it wasn't really useful.
step 2.
Finally select your mesh, but not poly/triangle editing and apply the whole texture over it again to get rid of any multi-material residue remaining.
Finalization
Step 1.
Once you've got everything merged into one big file and theres still plenty of room to spare.
You have two options:
Option 1.
If theres enough room to cut the texture by half then you can scale down (remember the increments: 2,4,8,16,32,64,128,256,512,1K,2K....)
Option 2.
If you want to clean up the original textures now you'd probably want to scale the entire image (not the canvas) up to fit the image size
Afterwards select your entire model and adjust the uvmap for everything to scale up to match.
Your done!