Another texturing update (also so I don't forget myself how to do these)
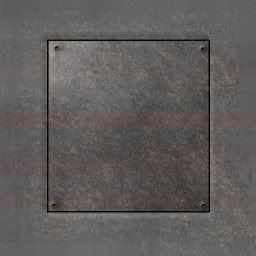
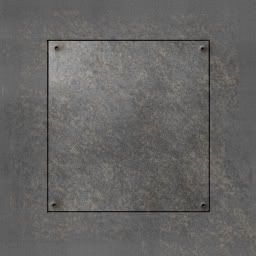
1.For this I'm using this as an example, note the name of this layer is called "Background".
2.I've added a simple panel to this:
Random Panel Noise
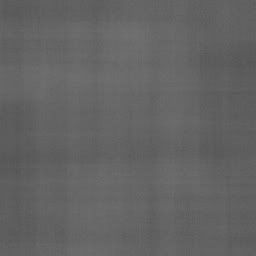
3.I then create a new layer, set it to Normal 42%.
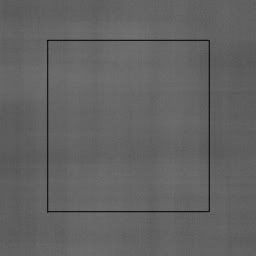
4.I then select the interior of the panel and use this photoshop script (i've also linked it with F12 key)
<Generate Panel Noise>
Set Foreground Color - black
Set Background Color - white
Clouds
Add Noise - Gaussian, 4%, monochromatic
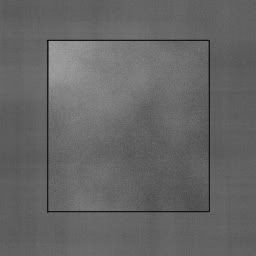
5. If the panel looks too similar to an adjacent panel, simply reapply it.
6.Repeat #4 for each additional panel. You can select multiple panels at a time, perferrably not having them touch each other.
Rivets
7. Next comes the buttons aka rivets. Create a new layer, leave it normal at 100%. Set the Blending options to:
- Drop Shadow
- Blend mode: multiple Color: RGB: (117, 70, 15) [A brownish color]
- Opacity: 90%
- Angle: This depends on which was the panel is facing, the brown shadow should probably face down or back
- Uncheck Use Global Light
- Distance: 4px
- Spread: 6%
- Size: 9px
- Bevel and Emboos
- Style: Pillow Emboss
- Technique: Soft
- Depth: 91%
- Direction: Down
- Size: 3px
- Soften: 2px
- Angle: 178 deg, check Use Global Light, 28 deg
8. Apply the rivets where you wish them to be.

9. If you have panels sections going in opposite directions (due to uving) you can, if you wish, create a second layer where the drop shadow is pointing in the right direction. (If your a perfectionist)
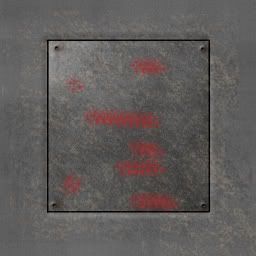
White Splots
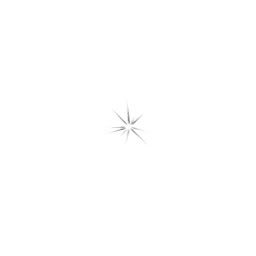
10. Create another new layer, leave at normal 100%. I'm not sure which group this brush belongs to, but the name is "Starburst large" size 49. Here's what it looks like:
11. Set the foreground color to white and throw several of these starbursts around the panel in a random fashion.
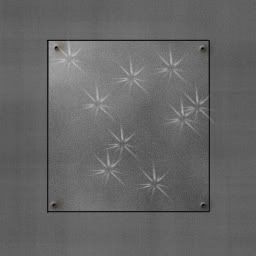
12. Next I run the follow script twice.
<Generate Panel Splots>
Add Noise - Gaussian, 47.7%, monochromatic
Crystalize - cell size: 10
Gaussian Blur - rad: 1.5px
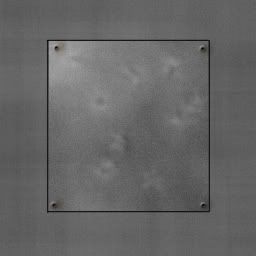
Brown Splots.
13. Switch to "Rolled Rag - Terry 120 pixels" I believe this one is under Faux Finish Brushes. (it's squarish in nature unlike similar ones which are round)
14. Create a new layer, using Linear Dodge, 33%
15. Set the foreground color to 80, 59, 24 (a brownish color)
16. Randomly apply the texture

17. Run the following script:
<Brown Splots>
Watercolor -  Effect: Watercolor, brush detail:9 shadow density:1 texture :1
Sponge - Effect: sponge, brush size:2, definition: 12, smoothness: 5
Rough Pastels - Effect: rough pastels, stroke length: 25, stroke detail:9, texture type: canvas, scaling: 94, relief: 19, light direction:bottom, without invert texture
Colored Pencil - effect: colored pencil, pencil width: 20, stroke pressure: 5, paper brightness: 0
Reticulation - effect: reticulation, density: 12, foreground level: 40, background level:5
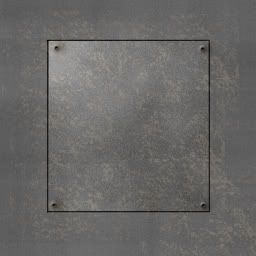
Black splots
18. Create a new layer, normal @ 13%
19. set foreground to black
20. Using the same brush, make more random marks like in #16
Line coloring
21. Reselect your panel lines and run the following script:
<Create white, black lines>
Duplicate current layer - Name : "White lines"
Set Layer Style of current layer - Drop Shadow: Color dodge,  Color: pure white, opacity: 87%, distance: 5px, spread:0%, size: 5px
Duplicate Current Layer - name : "black lines"
Set Layer Style of current layer - Drop Shadow: Mulitple, Color: black,  opacity: 87%, distance: 5px, spread:0%, size: 5px [Note angle should be opposite of "white lines"
General Large Noise
22. Select the entire area working on (easiest way is to ctrl+click on panel noise layer from #4 in Layers panel).
23. Apply this script:
<Panel Noise>
Select layer "Background"  (this is why that layer name was important)
Copy
Paste
Charcoal - Effect: Charcoal, charcoal thickness:1, detail:5, light/dark balance: 50
Set layer to "Vivid Light" @ 31%
Invert
24. If it comes out too bright or too dark, try inverting it again
25. This only seems to work great on larger area though.
Colored streaks
26. Select any color (darker red seems to work good)
27. Create a new group
28. Choose a faux type brush of your interest and smear some of it across the panel
29. Choose motion blur and blur it out until it's barely noticeable