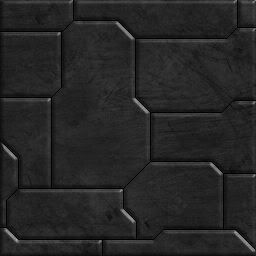
Heh, to be honest, if you've done any sort of plate texturing you'll have similar if not better techniques, but this one is really useful when you have the outlines of the plates ready.

(that and I really should write it down so I don't forget it again)
Anyway: For PSP 9, you do the following:
1) Set colour 1 to a dark grey & colour 2 to pitch black
2) Flood fill the entire area you want to turn into plating (if you have pre-existing plate outlines in place, make sure they're on a separate higher layer or something)
3) Set colour 2 to use
this (from BW) or a similar sort of texture with an angle of 38, and a scale of about 48
4) Apply it to your solid filled base colour (the whole thing) twice or so to get the desired brightnes of that bit of hull.
5) If you havn't already, create your hull plate outlines (I've found black, 1 pixel wide, no AA lines work best) and make sure they're a raster layer.
6) Merge all the layers so the outlines are on the same layer as the background hull.
7) Magic-wand-select (tolerance = 40, no AA) each individual plate outline you want to raise (if you've never heard of the wand, it's basically a 'select all connected pixels of colour X, with a tolerance factor)
8) When all the plates you want to raise are selected, use the bevel tool to raise them all. I found the following properties to work best for the plating effect: Straight slope, Width = 3, Depth = 2, Shininess = 28, Angle = 39, Intensity = 43, Elevation = 46, Light = White, All other settings = 0
Result:

And that should do it. Now, I'm sure all the texture Guru's here are looking at this shaking their heads in pity, but it provides a decent base technique, and needless to say, you can fiddle with any part of it to best suit your ship.


