As promised, a little guide into baking maps in Blender.
1) I suppose that you have your model looking sharp and good with all debris and stuff done. I will be using the Sekhmet to show you how to bake your pilot (or other parts) into a single texture, in order to reduce the quantity of textures. Beware that texture baking may be a math intensive process for your PC; so if you have an Intelgrated setup, you'll need a lot of patience.
The Sekhmet as released uses 3 materials:
-Sekhmet-map for the diffuse, mapped into Sekhmet.dds
-Sekhmet-trans-map for the transpared cockpit, mapped into Sekhmet-trans.dds
-Vaspilot-map for the pilot, mapped into Pilot.png
The UV layout is called UV1 and is refered by all materials. Here's an image of the materials configuration:
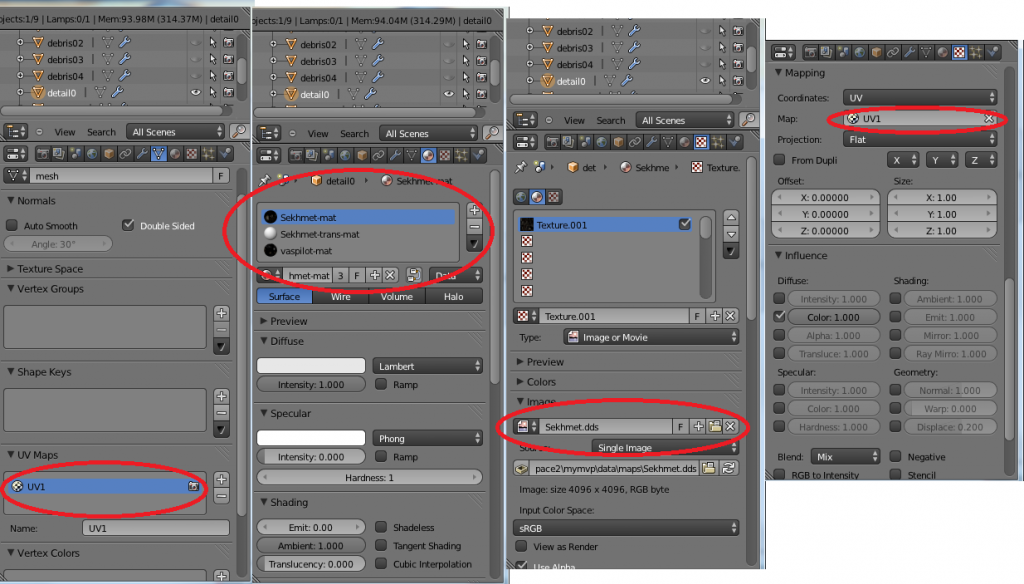
UV1 includes UVs for debris too (I did it the complicated way, but since 2.68 you can use the AtlasMap addon to map several different objects into one map).
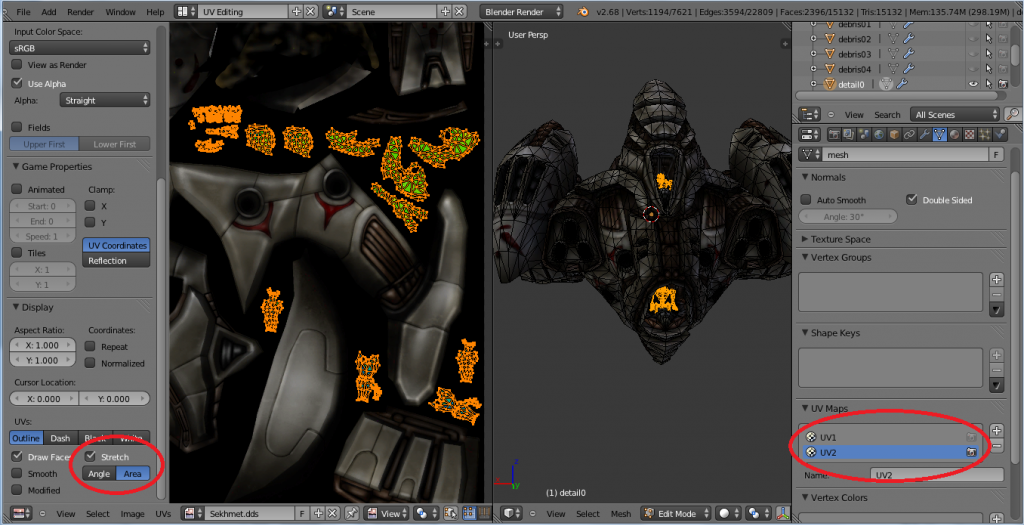
2) You'll need a new UV map. First add a new UV layout (in my case, UV2), select it and then do whatever you like to fit all your stuff into a single map. Of course your pilot UVs are huge so you'll have to reduce them. You can use the Stretch->Area option to ensure your resolution is good enough. Blue means your texture resolution is like the average, so I scale down to blue and then go up a bit, which makes it green or something (being a detailed object, the pilot deserves it).
Fortunatelly, I was able to fit my pilot UV into some unused space, so I won't touch the texture further. If you can't do that, you can move things all you need, it won't change much, but take into account that baking can blur textures a bit, so I prefer to keep the other parts the same and just add the new parts in GIMP.
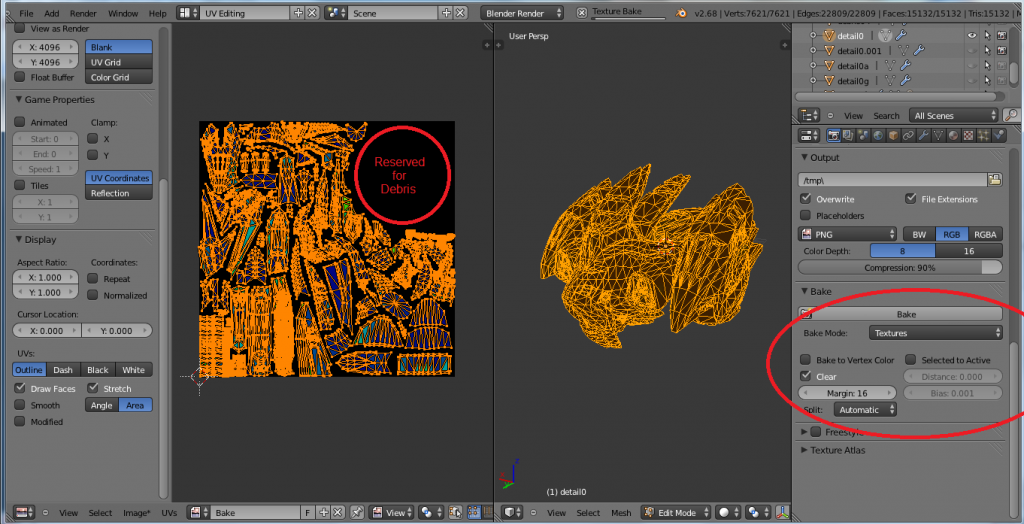
3) Now, create a new texture with the same size as your original one. If you don't, you'll be trying to read and write from the same file and Blender won't let you. Assign your UVs to the new map (mine's called Bake).
4) Before baking, make sure that your UV2 has the little camera on (this means that the render will use that UV instead of the other, the materials however are specified to use the other).
Now you're all set. Go to the bake menu, select textures, select your mesh and hit bake!
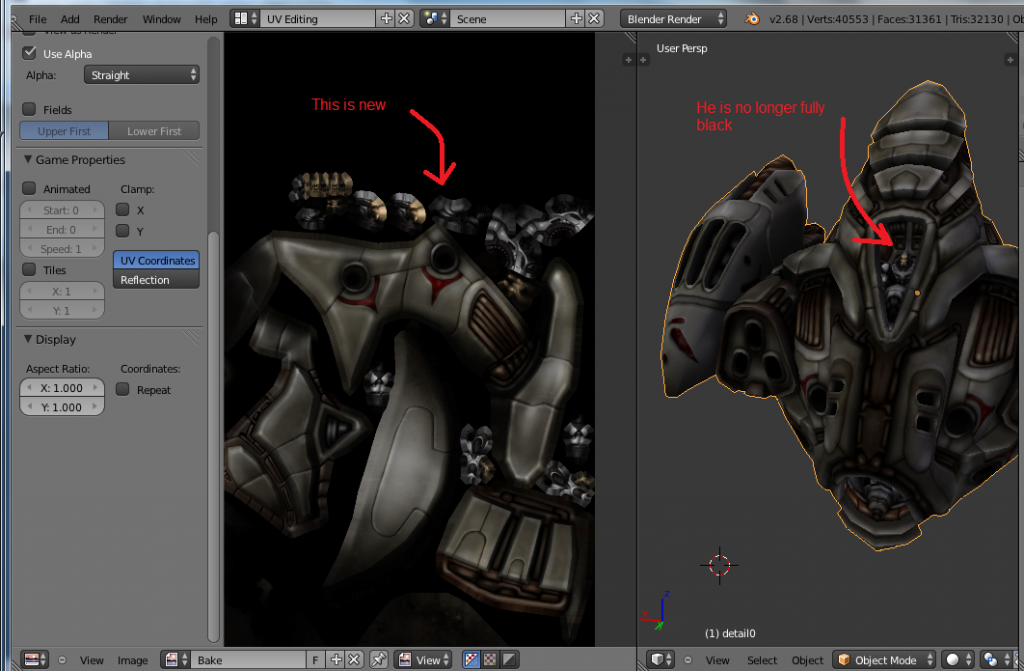
5) Once your rendering is over, save your file and you should have something like this:
6) Now, you have to reexport your model. In order to do so, I have to delete VasPilot-map as a material and apply Sekhmet instead. If you don't want to do all the conversion again, you can just delete your subobject from PCS2 and load the new one from your dae. Don't forget to check the export options, you should have "Copy" and "Material textures" checked but nothing else in the texture part. Finally, don't forget to remove your vaspilot reference from your pof. And we're done... are we?
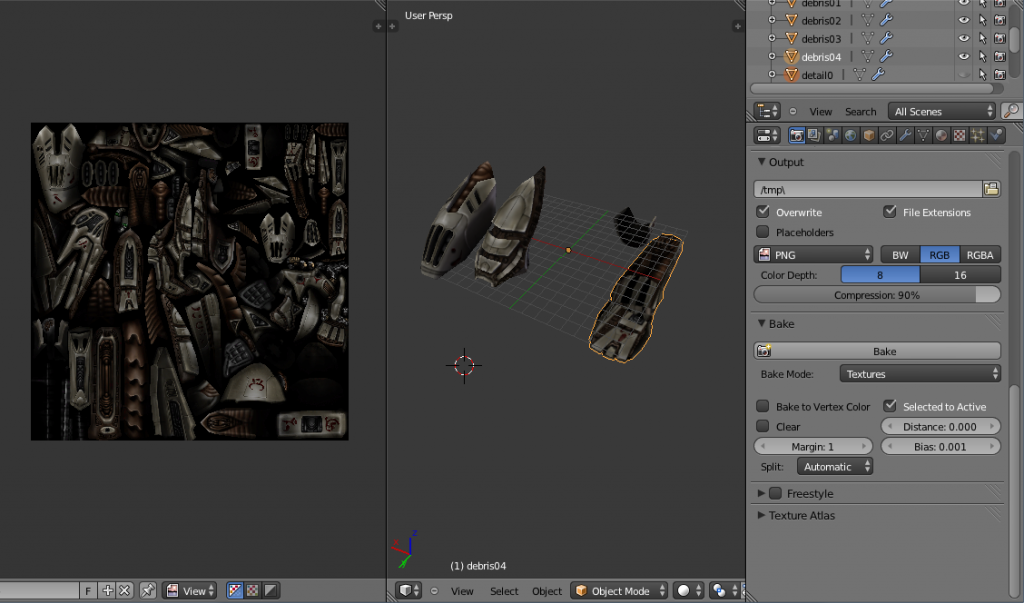
7) You can also bake from one object to another and this is specially usefull for debris. First, you should already have your debris mapped. Select detail0 then your debris. Then hit bake, but this time check the option (Selected to active). This way, your debris will reflect perfectly your ship texture without using it directly. The problem when your debris is mapped to your normal texture is that your glowmaps will remain glowing after your ship is destroyed which looks stupid. And once you have integrated that bake into your diffuse you can add all the wear and tear you want to those debris.
This is how it looked like with debris baked:
[
There is some nonsense there over the cuted areas but you should be texturing over those anyway so it's no problem.
So, why should we go into all this trouble?
1- Lots of textures is bad for Freespace AFAIK. Reducing them is good.
2- Having firing debris instead of glowing blue bits of a ship looks cooler.
3- You could use the same technique to transform a tiled ship into a "UVmapped" ship.
4- Once you have a mapped mesh, you can add ambient occlusion and baked glowmaps. But baking glowmaps is another story...
