3.0 TexturingMJNMixael taught me to texture with the agreement that I would write his teachings into this tutorial. I am also stealing from Scooby_Doo for dirtying things up, and I have come up with a few things that work for me. So here goes.
3.1 Base Texture (Diffuse)If you don’t already have it, get the latest version of Gimp from
http://www.gimp.org/downloads/Open it and then open the bomberAO file.
Then Open As Layers the bomberUV file. In your layer view in the toolbox, this should be above bomberAO.
You’ll probably want to register for an account where I get all of my metal textures.
http://www.cgtextures.com/Whether or not you do that at this moment doesn’t matter. At this moment what you need can be found in the metals pack that I uploaded, all of them come from the above link.
download the following.
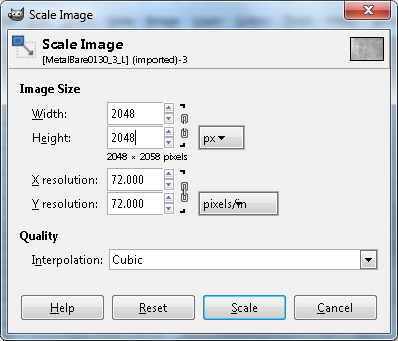
http://casofwar.hard-light.net/images/Metals.rarOnce you get the pack, dig out and open Metalbare0130_3_L. Open it in a separate by window by just going to File > Open > (your file). Do NOT open as a layer. Change the size by selecting Image > Scale. See below, and note that I clicked on the chain links to unlink our verticle and horizontal. 2048 x 2048.
Copy our resized metal by selecting Edit > Copy. Then you can close without saving. Go back to our main window (where we have the AO and UV). Paste this as a new layer by selecting Edit > Paste as Layer.
Now in your layers window, you should have 3 images. The top one should say Clipboard. Double clicking on the thumbnail for it will bring up Layer Attributes window, and change the name from clipboard to Metal 1. We will be bringing in another metal later, so be sure to include the number. Then you can click the thumbnail and drag it to beneath the other two layers. When finished your layer view should look like mine.
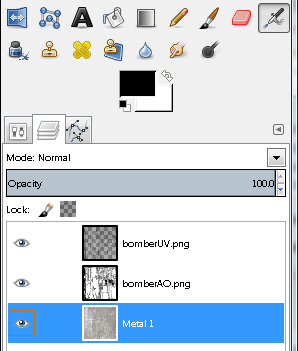
Click on bomberAO so that it is selected. Then look above our layers. In the above image you can see where it says Mode: Normal, with a drop menu on the same line. Click the drop menu and change the mode to Multiply.
Now select File > Export, and export to the same folder as where you saved bomberAO and UV. This should also be where you saved bomberGlass, and where you exported the DAE file from Blender. Name your current export as bomberText.png.
If you haven’t already done so, download PCS2, the latest version and open it.
https://googledrive.com/host/0B_qLK7VGhoIydUY1RFlzOVNMdGc/pcs2.7zOnce you get it open, select File > Open, and navigate to your DAE from the tutorial. Then open it.
We aren’t going to get into PCS very much, except to show you how to change and view your textures.
On the left of the image below, you will see many options that we can edit. Hit the + next to “Textures” to see a list of all textures associated with this model. There should be 3.
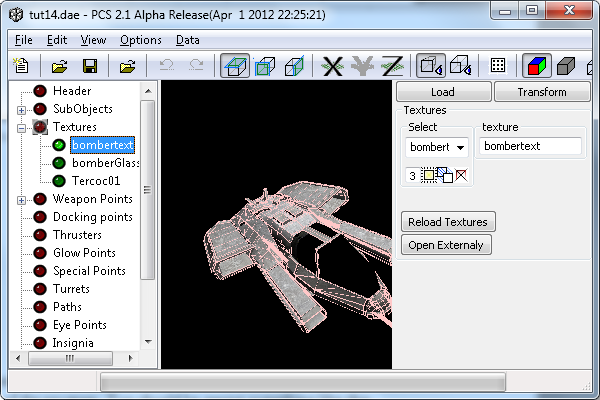
Notice that on the left I have “bombertext” selected, and on the right, in the box under “texture”, it says “bombertext”. Where mine says bombertext, yours probably says bomberAO, or whatever you saved the texture as. Change it to read what you just exported your texture as. Once you do this, simply moving your mouse away from the text box, or hitting enter will lock it in. Then hit the button that says “Reload Textures”.
Tell me when you get done so that we can continue. Ha Ha.
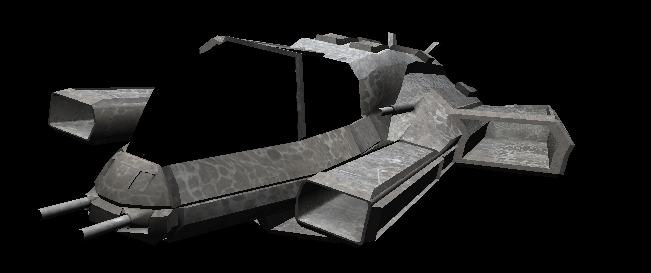
Since you never told me, I’ll continue anyway. Got some nice metal tuxtures goin on now. Click where it says “header” to get rid of the selection lines and view the texture. See below.
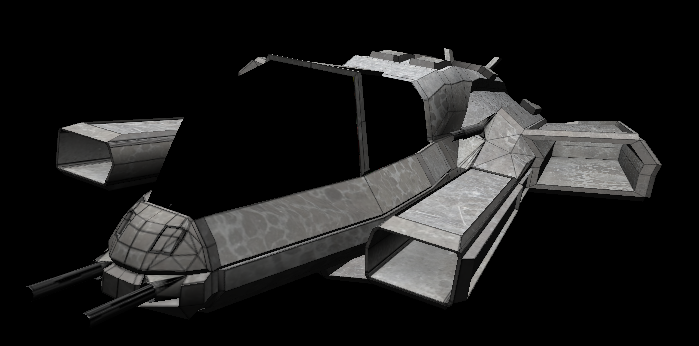
Right now you are probably sitting there going “Holy S**t this is so cool”. I think everyone did when they saw it for the first time. We did it wrong though. That was by design. Notice how we can see the edges of the faces? Look at the nose if you need clarification. We should NOT see them. The reason that we can see them is that we had our UV “on” when we exported the file. Let’s go back to gimp and do it right.
Notice where we see our layers that next to each layer is an eye? If you can see the eye then the layer is visible, click the eye for bomberUV. Notice how our texture changes? Now export as bomberText.png, and then reload textures in PCS2. Looks so much better now.
At the lower left of our main window in Gimp, you see some numbers and % (probably 25%). This is your zoom level. Hit the arrow next to it for the drop menu and zoom in to 400%. See below.
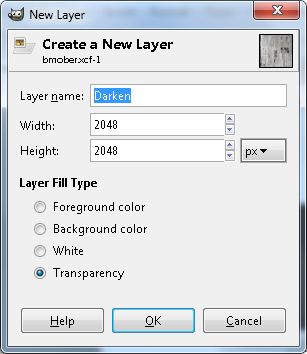
At the top select Layer > New Layer, and the new layer dialogue will open. Name this layer Darken, and leave it transparent. See below.
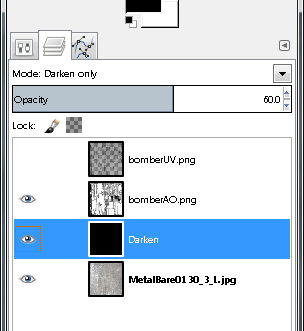
Move Darken to just above Metal 1. Then select the bucket fill tool in your toolbox, and making sure that Darken is still selected, fill the entire thing with black. Set its mode to Darken Only, and then set Opacity (right under Mode) to 59. See below for toolbox image of layer placement and settings for Darken. Notice that I have my UV map shut off.
Exporting the file now as bomberText.png and reloading textures in PCS2 will show that the ship is darkened, looks much better now.
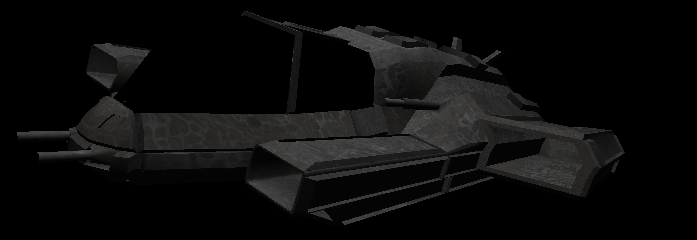
Let’s play with guns for a moment. I like my guns to be extremely dark. Not black, but you get the picture, or will at any rate J.
Scroll all the way to the top and left hand corner. Remember when we were doing the UV and we placed the guns down the left side of our UV? Well now we get to mess with them a bit.
Select the layer called Darken, and create a new Layer called Darken2, and leave it as a transparency. It should have appeared right above Darken, if not, move it there before continuing.
Your Layer view should be:
BomberUV - Normal - 100
BomberAO - Multiply - 100
Darken2 - Normal - 100
Darken - Darken Only - 59
MetalBase - Normal - 100
In your tool box, select the pencil. I used to use the paint brush for this, but found that the pencil works much better. Directly above Mode in our toolbox, you will find a few tabs. The one all the way to the left is our tool options, and right next to it is layers dialogue. Open tool options. Now set the size to 1.00. Then go back to layer dialogue. See below for tool options.
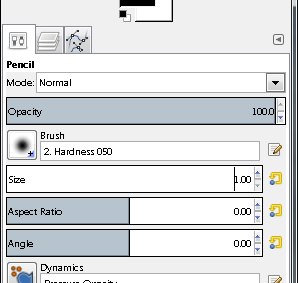
Turn off all of the layers by clicking the eye. Then turn on UV and Darken2. Click Darken2 to select that layer if it isn’t already. This is a very simple process.
Notice that the block I am pointing to below has a dot in the middle of it. That is because I clicked it. Clicking it, and then holding shift before a second click will allow you to create a line between the two points. So click where you see the arrow pointing in the first image, then Shift click where you see the second image.
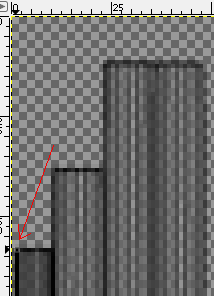
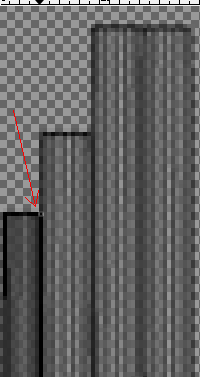
Continue to shift click until you have done the perimeter of what is highlighted below. Only do the perimeter, but make sure that is done right, as we are creating the border for flood filling. In the image below, I have zoomed out a bit to show you that we have now traced the perimeter of this UV island.
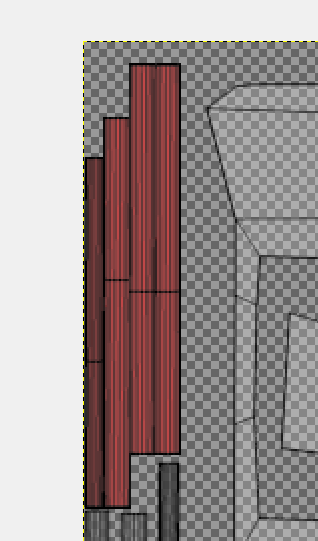
Now select your Flood Fill (bucket fill) tool and click somewhere within the perimeter of that UV island. The island should darken, but nothing else should if you’ve done this right. From this point we call this operation “Border and Fill.”
Border and Fill the rest of the gun UV islands. They all run down the left side and should be easily discernable. Two quick hints. You can include more than one UV island in your perimeter, and if you become unsure as to whether or not you did an island, you can always find out by turning the UV layer off. Just be sure to turn it back on after looking.
I did the perimeter work and then went back and filled them. Or you can fill each as you finish, whichever you prefer. As long as everything is done including the end caps at the bottom.
When you are finished with Border and Fill on the guns, turn off UV and turn on everything else. Notice turning things on and off does not select the layer, no matter how much you hit an eye, you won’t change layers that way. It is good to know.
Anyway, with all layers on except for our UV layer, set the mode of Darken2 to Darken Only, with an opacity of 59.
You can export and check it in PCS2. I do this several times, usually after each step to ensure that I like the finished product.
Open our model in Blender. Then go to UV. Select the face on the top of the small missile launcher as below.
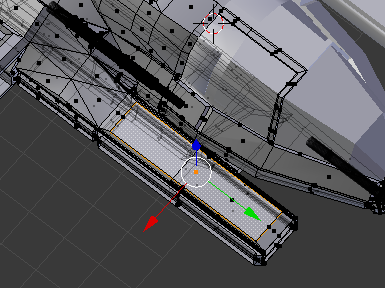
Notice how its counterpart on the UV is highlighted and nothing else is. See below.
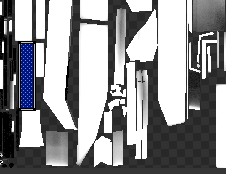
It is a simple matter to find that UV island on our texture in gimp. Zoom out to 100% to make it easier to find, then zoom into 200% and find it again.
Now in your tool box. That big black box sitting there, well that is your current color, click it and then get a nice red. My box is already red, seen below.
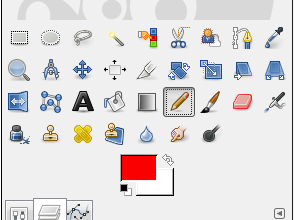
Select Darken2. Then create a new layer called “Red” and leave it as a transparency.
Your Layer view should be:
BomberUV - Normal - 100
BomberAO - Multiply - 100
Red - Normal - 100
Darken2 - Darken Only - 59
Darken - Darken Only - 59
MetalBase - Normal - 100
Make sure that Red is selected, and then create something like the following using Border and Fill. I zoomed out to 100% for the screenshot.
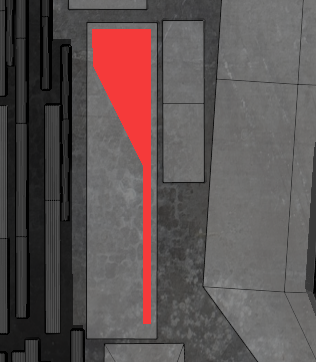
Set opacity to 70. Then export and see what we think.
I think it’s a little too much, so I am lowering the opacity to 55 and looking again.
Too much and too pink. So I am moving it to below Darken, and actually raising the opacity to 60. Try it and look again.
Your Layer view should be:
BomberUV - Normal - 100
BomberAO - Multiply - 100
Darken2 - Darken Only - 59
Darken - Darken Only - 59
Red - Normal - 60
MetalBase - Normal - 100
Still too visible for my tastes, but not what I call “anime bright”. I’ll leave it as a happy medium between my taste and those who prefer the anime bright. Let’s stay in red for a bit. Select the top faces of the large missile launcher as below, and then use what is highlighted in the UV to locate the island in our texture. Remember, when it comes to locating, have UV on. The only time it should be off is to color check and export.
Once you have it located make something like what you see below using Border and Fill.
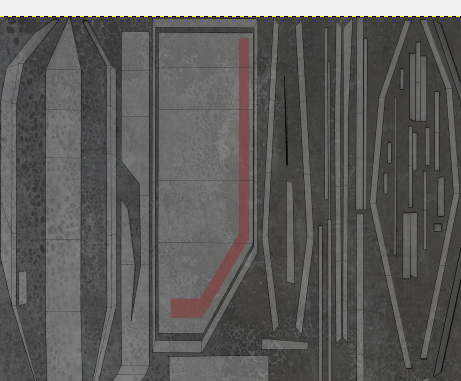
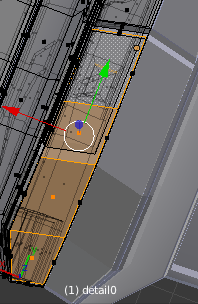
Select the back half of the Bomb bay in Blender, as below, and then find in our texture.
Do something like what you see below.
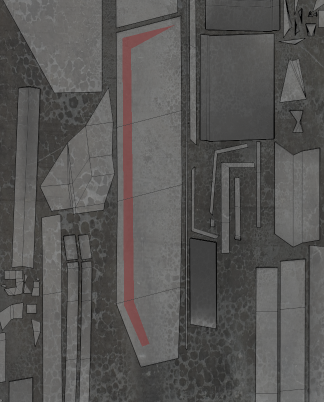
Kill the UV and take a look. that’s coming along nicely.
With the Red layer selected, create a new one called “Blue”, and then switch colors to a blue.
Your Layer view should be:
BomberUV - Normal - 100
BomberAO - Multiply - 100
Darken2 - Darken Only - 59
Darken - Darken Only - 59
Blue - Normal - 100
Red - Normal - 60
MetalBase - Normal - 100
Select the faces below from the side of the large missile bay and locate on the texture.

Paint it like the picture using Border and Fill. Set opacity to 60. Then kill the UV, export and take a look.
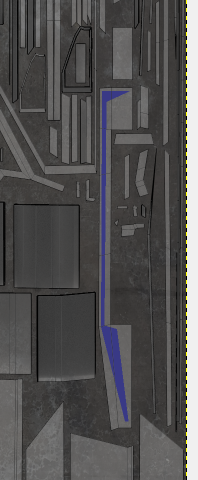
Looks ok. We’ll leave it.
Your Layer view should be:
BomberUV - Normal - 100
BomberAO - Multiply - 100
Darken2 - Darken Only - 59
Darken - Darken Only - 59
Blue - Normal - 60
Red - Normal - 60
MetalBase - Normal - 100
In Blender, select the sides of both the small missile launcher and the bomb bay as below.
http://i1283.photobucket.com/albums/a560/ShadowWolf_IH/tut3-23_zpsa3e8bdee.pngPaint some blue on those faces as seen below.
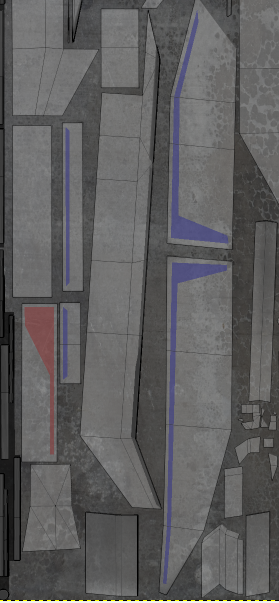
I think that we are done painting, you get the gist of how.
We are going to add some tech bits next. There are a number of programs that will let you extract files from the vp’s, and what you do is, you go through the textures there, and you study each one until you find something you like. Then you extract it. Then you keep going until you have enough bits to play with.
You take a piece of this one and place it stragetically, and then a piece of that one and place it strategically, and pretty soon you’ve done the tech bits.
Furtunately for you I am a nice guy, I won’t make you do that yet, instead I have all of the tech bits that you need for this model ready for download. Simply extract some somewhere that you can easily find them, but NOT in the folder we are using for our model and texture.
http://casofwar.hard-light.net/images/TechBits.rarSelect the following face in Blender, and then find the corresponding face on our texture.
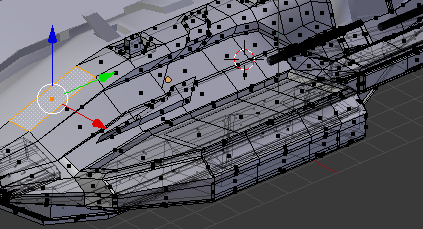
Now Open as Layer “Dock.png”. Yes navigate to the tech bits I sent you, and open that one as a layer. This new layer goes under UV and AO, but above everything else.
Your Layer view should be:
BomberUV - Normal - 100
BomberAO - Multiply - 100
Tech Bits - Normal - 100
Darken2 - Darken Only - 59
Darken - Darken Only - 59
Blue - Normal - 100
Red - Normal - 60
MetalBase - Normal - 100
It is only half the texture, place it as follow. Once you have it placed, zoom in to 400% and make sure it lines up on the edge of the UV for that face. See below.
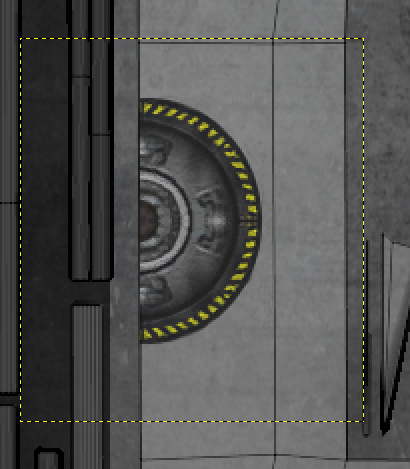
Export and take a look.
Select the four faces shown below, and find them on your Texture.
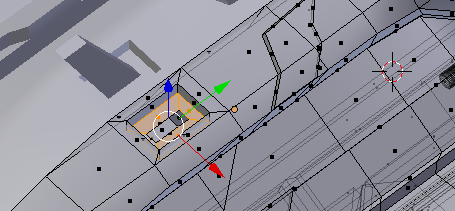
Now go ahead and grab Beam3.png and Open As Layer. Open it directly above Tech Bits.
Your Layer view should be:
BomberUV - Normal - 100
BomberAO - Multiply - 100
Tech Bits 2 - Normal - 100
Tech Bits - Normal - 100
Darken2 - Darken Only - 59
Darken - Darken Only - 59
Blue - Normal - 100
Red - Normal - 60
MetalBase - Normal - 100
Scale Tech Bits 2 by selecting Layer > Scale. and make it 125 by 125.
Now position it like below. You will need to do this in increments, start at 100%, then 200%, then 400%. Notice that there is barely any overhang in the upper left corner. If we wanted to, we could rotate this and set it perfect, but there is no need here.
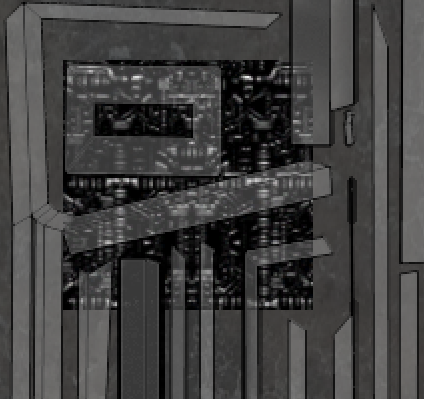
In your tool box you have a rectangle selection tool, click it, and use it to outline the part of the UV map that we want, keeping overhangs as close as possible.
Select Select > Inverse. This inverts our selection. We do this so that we can erase everything else in this layer, without touching the stuff we want to keep. Follow me?
With things inverted, go to your toolbox and right click the layer called Beam3. If it is in fact directly above the layer we put our docking ring on, select Merge Down.
Your Layer view should be:
BomberUV - Normal - 100
BomberAO - Multiply - 100
Tech Bits - Normal - 100
Darken2 - Darken Only - 59
Darken - Darken Only - 59
Blue - Normal - 100
Red - Normal - 60
MetalBase - Normal - 100
Use your eraser tool to erase our tech bits until you have something like below. You will need to resize it, but I taught you how. I set mine on about 5.
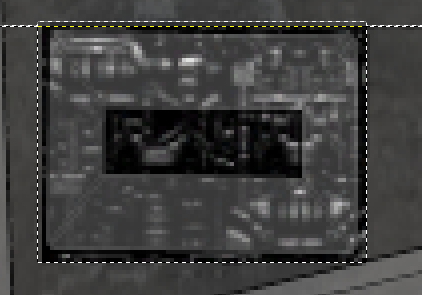
Now select the inner box using your rectangle select, and then erase it. See below.
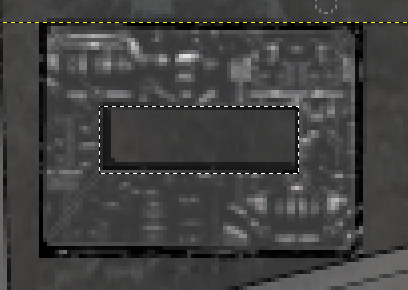
Select Select > None.
Shut UV off, export, and take a look. Not bad but a little too bright. Let’s darken it. Make sure that our tech bits layer is selected, and then use your rectangle selected tool to select our tech bit. Grab your brush, and change the color to black. Under tool options set the opacity to 27, size 15.. Go over the entirety of our box a few times, but over the outside portion about 6 times. See below for finished.
http://i1283.photobucket.com/albums/a560/ShadowWolf_IH/tut3-31_zps0f4f9db0.pngThat darkened things up nicely. Don’t forget to Select > None before exporting. Now when we darken the greeble walls it will look pretty nice.
We have our tech on one layer, but you don’t have to, You can put each one on a separate layer. In order to erase though and not leave behind a white box, you need to merge with a transparent layer first, which is what we did. You can darken each piece individually the way we did, you can play with the opacity of some paint stuff to make it look faded, you can darken some areas of paint to make it look “abused”. Possibilities are limitted by only by imagination.
I am just going to add a bunch of tech stuff now, and then show you some images. You know how to add them, all of the lessons are held in here. I will tell you any “special” things that I did.
Arbitrary Rotation. If you go to Layers > Transform, one of your options is Arbitrary Rotation. Open something as a layer, and go into Arbitrary Rotation. You’ll have it figured out in no time.
Break the chain to scale on one axis instead of both.
Use opacity settings on the new mayer before merging.
Use your lasso to surround an area that you want to paint without painting anything else (or darkening).
When you are done with these, come back here, we’ll have some more fun with grunging things up a bit, and then with Glow maps, Shine, Normal, -trans, maps. We still have a good amount to do before we are finished with our texture.
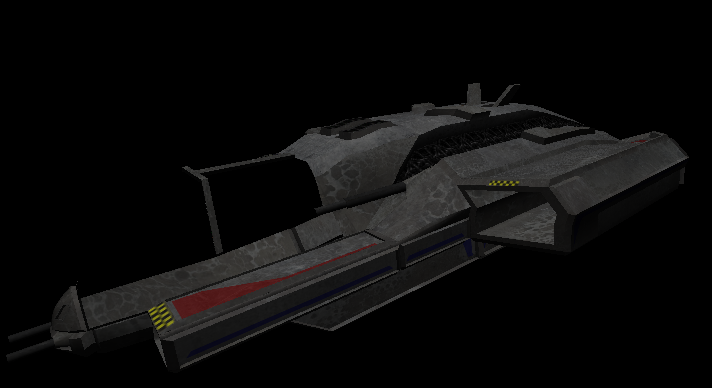
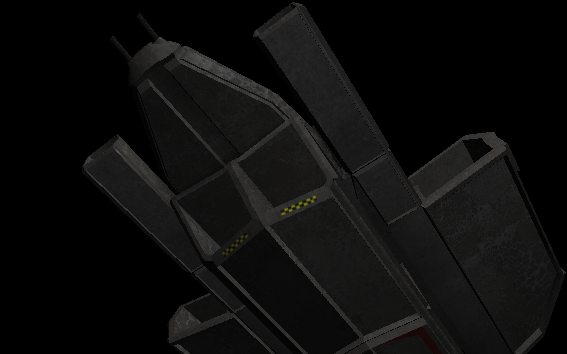


Once I got the canyon tech placed, which was actually one piece scaled down, and then Layers > Duplicate and move the layer, I went over it with a paint brush size 50, then I went over the outside edge one more time. Basically I kept the border of the tech about halfway into the brush (circle).
Other than that it was pretty strightforward, simply use the lessons that you learned above.
It is taking shape, but we have work to do. Currently it looks like it has been stamped out of one pice of metal, which it has. We need to defeat this, but first, I don’t much care for the color of the metal. So, click on our Metal1 layer, and then select Layer > New Layer. Call it Gunmetal Bluing, and it doesn’t matter what fill color we use (mine was still on transparency).
Your Layer view should be:
BomberUV - Normal - 100
BomberAO - Multiply - 100
Tech Bits 2 - Normal - 100
Darken2 - Darken Only - 59
Darken - Darken Only - 59
Blue - Normal - 100
Red - Normal - 60
Gunmetal Bluing - Normal - 100
MetalBase - Normal - 100
The new layer should be directly above your metal base. Change colors and get a nice royal blue. Then bucket fill after making sure that Gunmetal Bluing is the selected layer. Set the blend mode of the layer to “Color”, and the opacity to 7.
I like that bunch better, the difference is subtle, but very cool. That’s a pretty good lesson, subtle is a good thing.
File > Open Metalbare0130_5_L. This will open in a separate window. Resize it to 2048 x 2048. Edit > Copy. Then you can close that window, and in our main texture window, Edit > Paste As > Layer. Then move the new metal layer all the way to the bottom. Kick up UV, we will need it turned on.
Your Layer view should be:
BomberUV - Normal - 100
BomberAO - Multiply - 100
Tech Bits 2 - Normal - 100
Darken2 - Darken Only - 59
Darken - Darken Only - 59
Blue - Color - 7
Red - Normal - 60
Gunmetal Bluing - Normal - 100
MetalBase - Normal - 100
Metal2 - Normal - 100
What we are going to do now is take care of the “stamped from one piece of metal” look. We do this by erasing our metal base in strategic areas to let a different metal base shine through. I hope that sums up what we are about to do.
With the bottom layer (Rename it to Metal 2) selected, create a new layer, this layer need not be named, but does need to be transparent. Once it is created, merge MetalBase with it. Name this new layer Metal 1.
Use your Lasso select tool to select the area outlined below. Then hit Delete. And don’t worry about the area on mine being black, I’ll get you there.
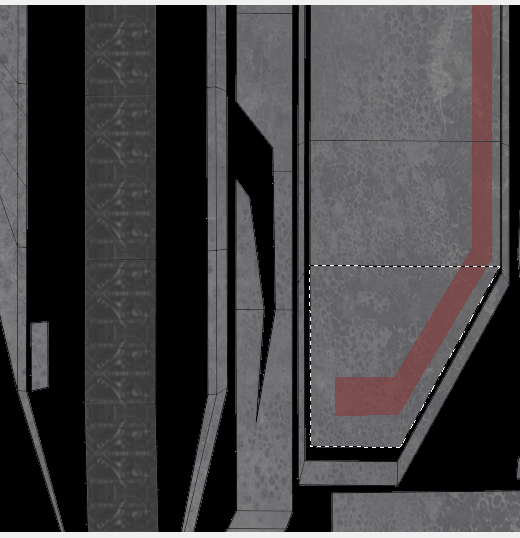
Notice how it went away? Select > None and then take a look in PCS2. That’s all there is to it. Stay with me while we do some more.
Looks pretty good, but I think it is too bright. Change the color to black in your color selector. With Metal 2 selected create a new layer, filled with Foreground color. Name the layer Black. Set opacity to 26, and mode to Darken.
Your Layer view should be:
BomberUV - Normal - 100
BomberAO - Multiply - 100
Tech Bits 2 - Normal - 100
Darken2 - Darken Only - 59
Darken - Darken Only - 59
Blue - Color - 7
Red - Normal - 60
Gunmetal Bluing - Normal - 100
MetalBase - Normal - 100
Black - Darken - 26
Metal2 - Normal - 100
Now export and take a look in PCS2. That looks better. Go ahead and do the rest of that section...ie the top of the large missile bay. All of the flats. Do the bottom as well. See below.
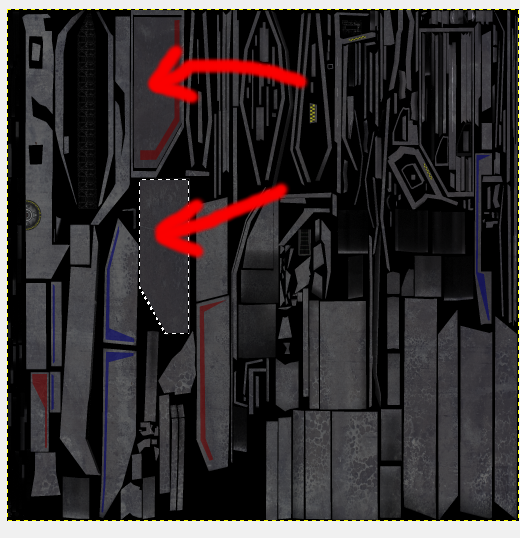
Now get the following sections of the small missile bay.
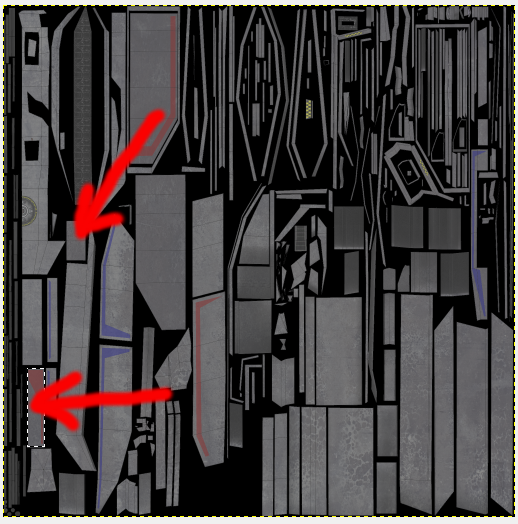
We’ll only do a few more in this tutorial, but what you are wanting to achieve here is simply breaking up the model. It adds a splash of color, even if it is simply a different shade. You get the picture. Keep thing flowing with the lines of the model.
Get the pieces that you see highlighted in the next two images.
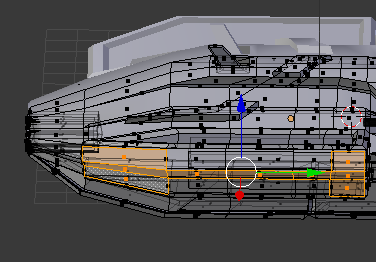
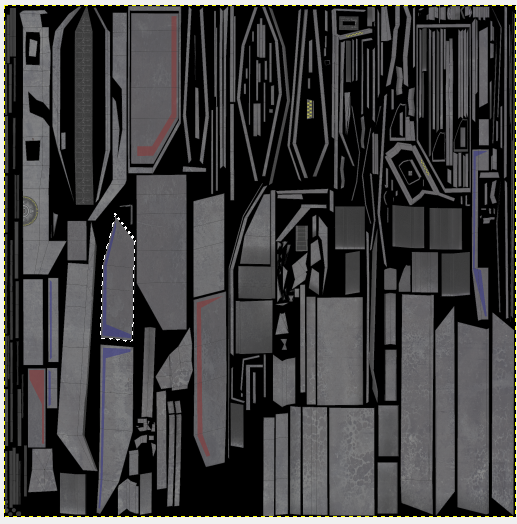
Select the canyon walls, the tops of the greebles shown, and the outside of the fuselage near the gun mount. See below.
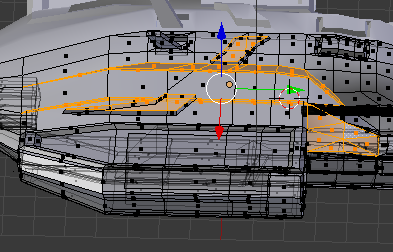
You know what to do. Normally I would do more than this with it. Normally I would use 3 metal textures. The thing about using 3 is, go over the model deleting in strategic places like we’ve been doing, but delete from the top TWO metals. Then go back over the model and delete from only the top metal in other places. You understand, in some places you want the bottom texture to show through, in others the middle, and in others the top.
If you want the bottom metal to show through, make your selection, delete from the top metal layer, then switch to the middle layer and delete from it.
If you want the middle metal layer to show, only delete from the top metal layer.
At this stage I usually darken my greeble walls. We aren’t going to because it is a pain. It is worth it on a model for release, the darkened walls add depth. It is really easy, use your lasso to make your selection, then use the brush painting black. Brush options are either Darken or Normal, with your opacity of the brush set to your liking.
As long as we are discussing “to your liking”, remember that all of the Opacity settings in this tutorial are to MY liking. Change them to what YOU like when you do your own model.
Before you start deleting from the metal layers, take a look at what you have. The large panels are boring and lackluster. We could have gone with some smaller panels. To do this, simply create a transparent layer under the UV, and draw on it with a black Pencil. Making smaller panels inside the larger ones.
Your Layer view should be:
BomberUV - Normal - 100
BomberAO - Multiply - 100
Tech Bits 2 - Normal - 100
Darken2 - Darken Only - 59
Darken - Darken Only - 59
Blue - Color - 7
Red - Normal - 60
Gunmetal Bluing - Normal - 100
Lines - Normal - 100
MetalBase - Normal - 100
Black - Darken - 26
Metal2 - Normal - 100
Even though we didn’t do this (mostly because I forgot until it was far too late), I will show you what I mean in the images below. Before and after.
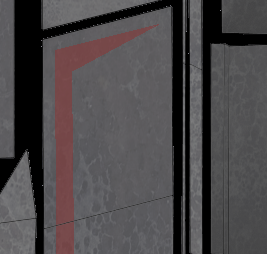
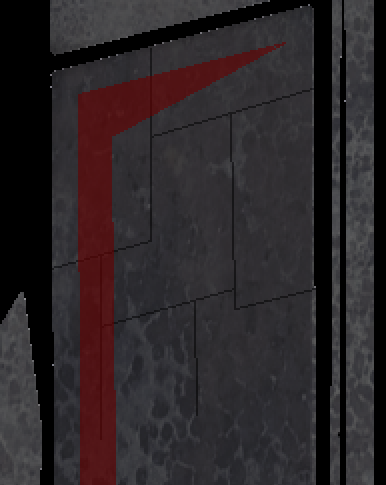
What I did was use the pencil tool color black, and in tool options made it size 1.00, Mode normal, hardness 2, opacity 100. Create a transparent layer called Lines just beneath the UV layer, and draw the lines on it. Then move Lines to just above my top metal. Set the opacity of the layer to 50. Done.
Your Layer view should be:
BomberUV - Normal - 100
BomberAO - Multiply - 100
Tech Bits 2 - Normal - 100
Darken2 - Darken Only - 59
Darken - Darken Only - 59
Blue - Color - 7
Red - Normal - 60
Gunmetal Bluing - Normal - 100
Lines - Normal - 50
MetalBase - Normal - 100
Black - Darken - 26
Metal2 - Normal - 100
You want UV on for that so that you can trace any of the lines on the UV where things remain flat. Don’t trace lines where panels come together in a 3 dimensional angle.
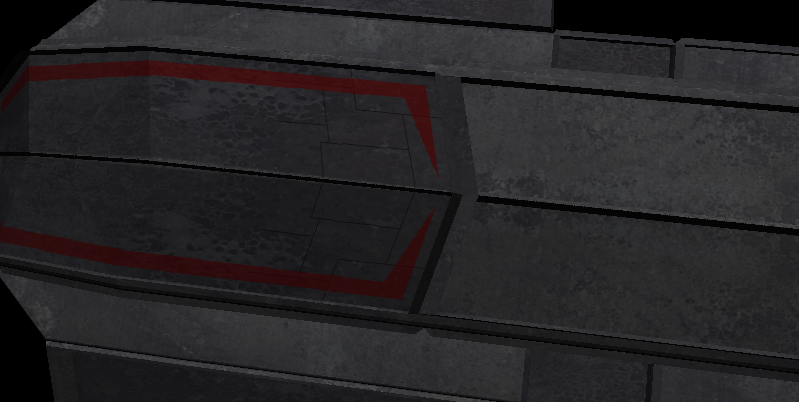
If you look really close, you can see a line drawn in the red. It was actually drawn in black, but because we put Lines beneath everything except our metal layers, any paint will show on the line, making it appear to have been painted.
Remember that these lines offer a great deal of versatility for changing which metal is shown.
Something else that you can do is create some rivets. A simple black dot is all it takes.
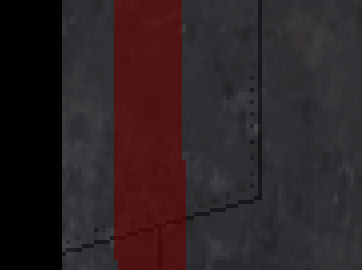
I created a transparent layer called Rivets and then used a paintbrush size 1.00, hardness 2, mode normal, opacity 100, angle 22. If you opt for rivets, remember to only put them on one side of a “seam”.
Your Layer view should be:
BomberUV - Normal - 100
BomberAO - Multiply - 100
Tech Bits 2 - Normal - 100
Darken2 - Darken Only - 59
Darken - Darken Only - 59
Blue - Color - 7
Red - Normal - 60
Gunmetal Bluing - Normal - 100
Rivets - Normal - 100 **optional**
Lines - Normal - 50 **optional**
MetalBase - Normal - 100
Black - Darken - 26
Metal2 - Normal - 100
Let’s dirty things up a bit.
Create a new transparent layer called Grime1. Place it above Tech Bits. Mode should be Multiply, opacity 50.
Your Layer view should be:
BomberUV - Normal - 100
BomberAO - Multiply - 100
Grime1 - Multiply - 50
Tech Bits 2 - Normal - 100
Darken2 - Darken Only - 59
Darken - Darken Only - 59
Blue - Color - 7
Red - Normal - 60
Gunmetal Bluing - Normal - 100
Rivets - Normal - 100 **optional**
Lines - Normal - 50 **optional**
MetalBase - Normal - 100
Black - Darken - 26
Metal2 - Normal - 100
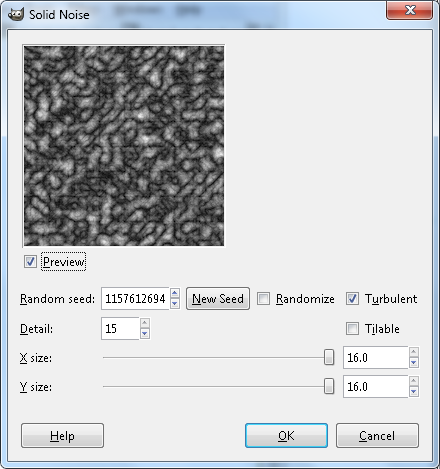
With Grime1 selected, select Filters > Render > Clouds > Solid Noise. When the dialogue comes up. make your settings as below, and hit OK.
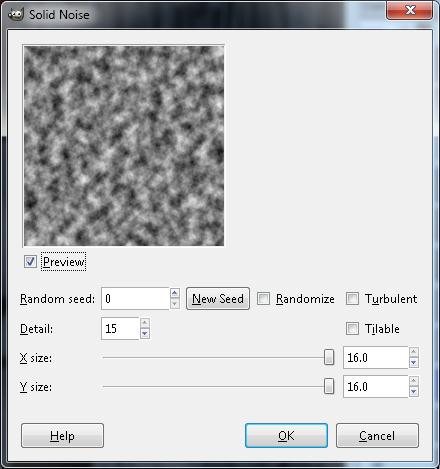
Select Color > Brightness and Contrast. Set Brightness to -90, and Contrast to 90.
Now select Color > Invert. Then select Color > Color to Alpha. It should still be white, if so hit ok. If not, make it white, then hit ok.
Now select Filters > Blur > Motion Blur. You can adjust these settings to taste, but for the purposes of this tutorial, set it at Linear, Length = 47, Angle = 89. Angle 0 will give you a horizontal smear, so angle 90 gives a straight up and down one. Since most of our texture is “verticle”, we will go with a 90.
Some rust will be a bit harder, but not much. Select Tech Bits, and create a new transparent layer called Rust. Set the mode to Screen and the opacity to 50.
Your Layer view should be:
BomberUV - Normal - 100
BomberAO - Multiply - 100
Grime1 - Multiply - 50
Rust - Screen - 50
Tech Bits 2 - Normal - 100
Darken2 - Darken Only - 59
Darken - Darken Only - 59
Blue - Color - 7
Red - Normal - 60
Gunmetal Bluing - Normal - 100
Rivets - Normal - 100 **optional**
Lines - Normal - 50 **optional**
MetalBase - Normal - 100
Black - Darken - 26
Metal2 - Normal - 100
Switch to a nice rust color, I am using html notation b32d00, and flood fill the layer using your bucket.
Select Tech Bits again and create a new transparent layer called Noise.
Your Layer view should be:
BomberUV - Normal - 100
BomberAO - Multiply - 100
Grime1 - Multiply - 50
Rust - Multiply - 50
Noise - Normal - 100
Tech Bits 2 - Normal - 100
Darken2 - Darken Only - 59
Darken - Darken Only - 59
Blue - Color - 7
Red - Normal - 60
Gunmetal Bluing - Normal - 100
Rivets - Normal - 100 **optional**
Lines - Normal - 50 **optional**
MetalBase - Normal - 100
Black - Darken - 26
Metal2 - Normal - 100
With Noise selected, select Filters > Render > Clouds > Solid noise, and use the following as your guide for the settings.
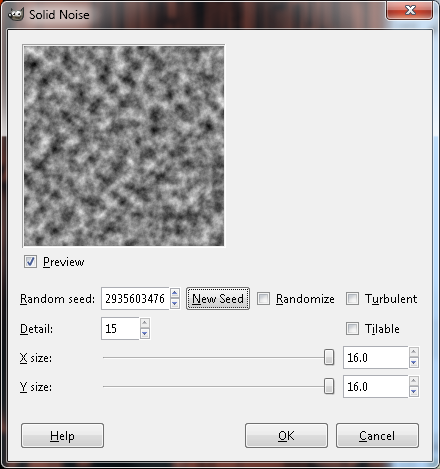
Once it renders the clouds, turn everything off except for the layers named “Noise” and “Black.”
Select Colors > Brightness and Contrast. Set Brightness to -96, and Contrast to 99. You can really see the difference in this, so adjusting them will grow or shrink your rust areas. For what it’s worth, this also works for our grime layer.
With Noise selected, Edit > Copy, and then turn on everything except for UV. Then turn off Noise.
Select the layer called Rust, and select Layer > Mask > Add Layer Mask. When the dialogue pops up make sure that White (full opacity) is selected and hit Add.
Next to our Rust thumbnail is a white box. Click it. Now click the Rust thumbnail. You are switching between the layer and the mask. Whichever is inactive has a black outline, the active one has a white outline. So select the mask, and then hit CTRL V to paste, and CTRL H to anchor it.
Your Layer view should be:
BomberUV - Normal - 100
BomberAO - Multiply - 100
Grime1 - Multiply - 50
Rust - Multiply - 50
Noise - Normal - 100 ** off **
Tech Bits 2 - Normal - 100
Darken2 - Darken Only - 59
Darken - Darken Only - 59
Blue - Color - 7
Red - Normal - 60
Gunmetal Bluing - Normal - 100
Rivets - Normal - 100 **optional**
Lines - Normal - 50 **optional**
MetalBase - Normal - 100
Black - Darken - 26
Metal2 - Normal - 100
Currently we have rust on our canyon floor, and I don’t want it there. Select the mask, and then use your lasso tool to outline the tech in question. See below.
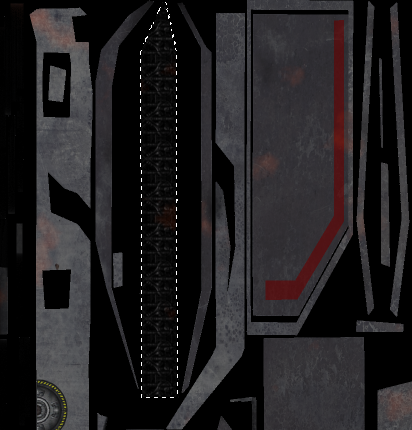
Hit delete. Switch from the mask to the layer, and hit delete a second time. When you delete on the mask, you are deleting the cloud cover, when you delete on the layer, you are deleting the color.
Switch the color selector to Black or White, either one. Select your AO layer, and then use your bucket flood fill on it. Choose somewhere outside of all of the islands.
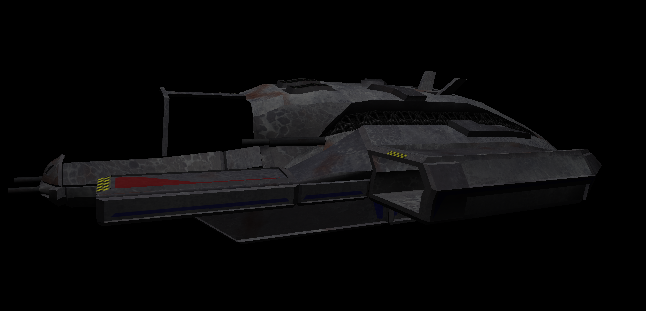
The Grime and Rust are adaptations of what Scooby does. He does other things that we can’t do with our model due to the mirror modifier. To see how he does things and get some more tips visit
http://www.hard-light.net/forums/index.php?topic=43189.20You can delete Noise. We are done with our base texture.
 3.2 Glow Maps
Glow Maps are easy. They give us some lighting effects on our model, and can do some pretty cool stuff.
For now, you can save your bomber.xcf in gimp and close it. Then open bombertext.png. Make a new layer called Glow. Make it black, or flood fill it black, what ever you want to do.
Your layer view should be:
Glow - Normal - 100
bombertext - Normal - 100
Turn Glow off.
Open a new image, by selecting File > New. Make it 512 x 512. Now add some noise by selecting Filters > Render > Clouds > Solid noise. Make it like the image below.
Let’s create some extreme lightning by selecting Colors > Invert.
Now select Colors > Threshold, and make your settings 128 and 153. Hit OK.
Create a transparent layer called Blue, and then flood fill it with Royal Blue. Then give it a mask by selecting Layer > Mask > Add Mask. In the add mask dialogue, select Black (Full Transparency). Then copy our noise layer and paste it into the mask. Don’t forget to anchor it.
Delete the noise layer, and Duplicate Blue by selecteing Layer > Duplicate Layer.
We need to blur the bottom one now. Make sure that you have the mask in Blue selected, and select Filters > Blur > Gaussian Blur, set it to 20 and 20.
Select Edit > Copy Visible. This is important because copy will only give you the layer, or selection. Copy Visible is what we need here. Then go back to our main work window and select Edit > Paste As > New Layer.
Duplicate the layer and then use your move tool to move the duplicate until it becomes an extension off the bottom of the original layer. Change original to Blue 1, and merge the duplicate down by by right clicking on the duplicate layer and selecting Merge Down.
The layer was too short for our needs, so we lengthened it by Duplicating, moving and merging. Duplicate the finished product and name the Duplicate Blue2. Then turn Both Blue Layers off.
Using your Lasso tool, select an area like the one below. Notice that I am INSIDE the edges of the island. I used a zoom of 400 for this.
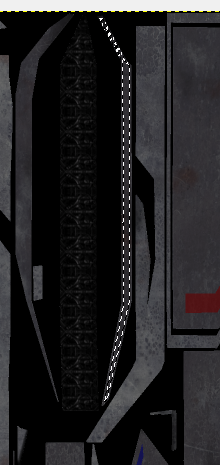
Turn on Blue 1, make sure that it is selected. Then invert our selection by selecting Select > Invert. Then hit delete. See below.
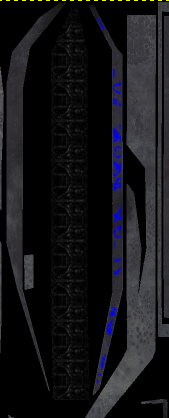
Now let’s do our other canyon wall. Make your selection using lasso. Turn on Blue 2, Select Blue 2, Invert selection, and hit delete.
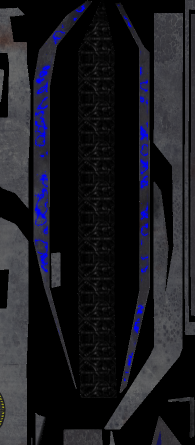
Now merge Blue 2 Down into Blue 1.
If you want to see how it looks, turn on Glow, and then export as bomberText-glow.png. Take a look in pcs2.
When you get back, go into your secondary work window. The one where we built the Blue layers with masks. Select Image > Scale, and change it to 256 x 256. Copy visible.
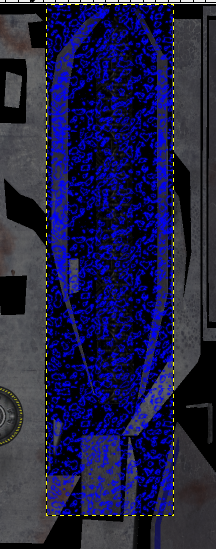
In your primary work window, paste as a new layer. Move the layer so that it spans across both canyon walls. Then duplicate it and move the new layer down, in essence lengthening the original. Keep duplicating until and moving until both canyon walls are covered, then start at the the top and merge them down until there is only one new layer. Name it Blue 2. See below.
Duplicate the layer and name it Blue 3. Turn Blue 2 and Blue 3 off, then use your lasso and make a selection like below.
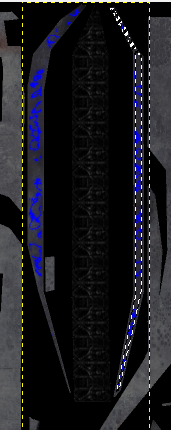
Turn on Blue 2, and make sure that Blue 2 is selected. Invert the selection by selecting Select > Invert, then hit delete, then Select > None. See below.
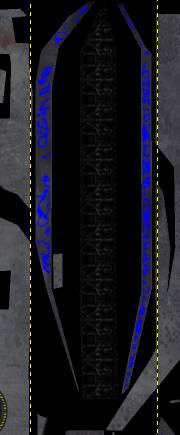
You already know that we are going to do the other canyon wall and Blue 3. I don’t think I need to walk you through it. Make it happen. See below.
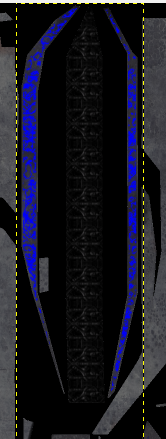
Merge Blue 3 down into Blue 2. Then duplicate Blue 2 and call the duplicate Blue 3. With Blue 3 selected, select Filters > Blur > Gaussian Blur. Set it at 20. Merge Blue 3 down when finished.
Create a new transparent layer called Blue 3. Set your paint brush size to 10, and draw the following lines on the canyon floor.
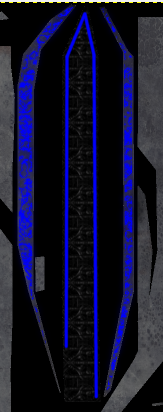
Guassian Blur Blue 3 at 20. Set the Mode to Normal, Opacity 10. Then Merge it down into Blue 2, and Merge Blue 2 down into Blue 1. See below.
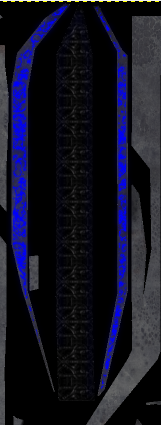
Select the face that you see selected below. Then find it on the UV. It is small, so you will have to zoom in to find it. Hint, it is in the center. NOw find it in our Glow map window.
I went ahead and zoomed in to 800 for this one. Most times I will work in the same XCF that I used building the base texture. It allows you to have the UV map up, which helps.
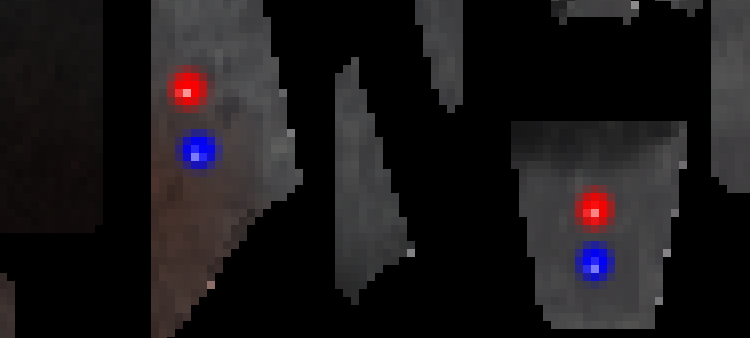
Mkae sure that your Blue layer is selected, and use a paint brush with size set at 7. See below for what to do. In order to get it as dark as what you see below. You need click 5 times in each color.
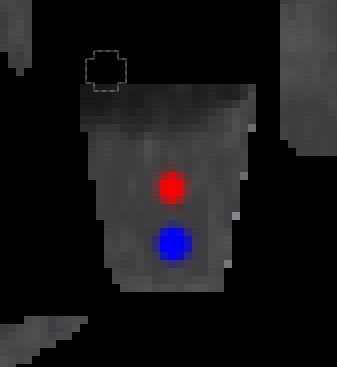
Looks pretty good, but we are about to make it look better. Change your brush color to white, size 1, opacity 75, and click 3 times for one pixel in red, and 3 times for 1 pixel in blue. See below.
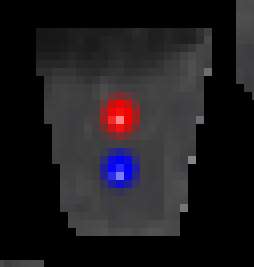
Zoom out to 200%, looks good.
Select the following face of the model in Blender. Then find it on the texture.
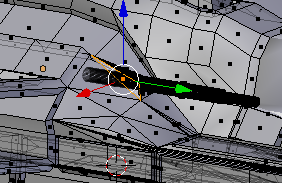
Follow the exact same procedure as above to make the image below. Of course it is sen in relation to what we just did.
Move over to your dock tech, and then select Select > By Color, and click any of the yellow, then shift click to keep selecting the different shades. Shift select until your selection is comparable to below.
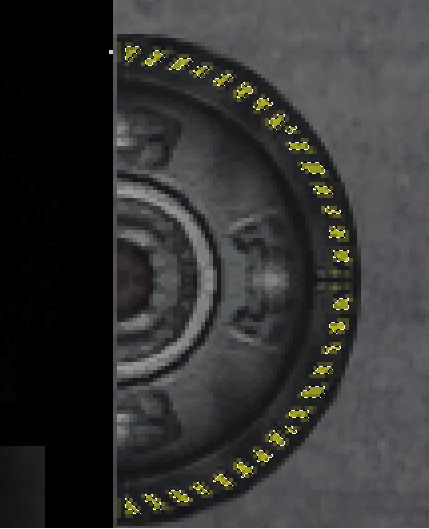
Edit > Copy, then switch to Blue 1, and simply CTRL V to paste, and CTRL H to anchor it. Turn Glow on and zoom out to about 50.
Notice that we also got the checkerboard patterns that we put on the front of our missile / bomb bays. We could leave it, but then it would look too new a dirty and somewhat rusted bomber. So simply erase them.
Turn on Glow, export as bombertext-glow.png, and take a look. We are done with the glow map.
